Building an indoor NFT hydroponics system with Raspberry Pi monitoring
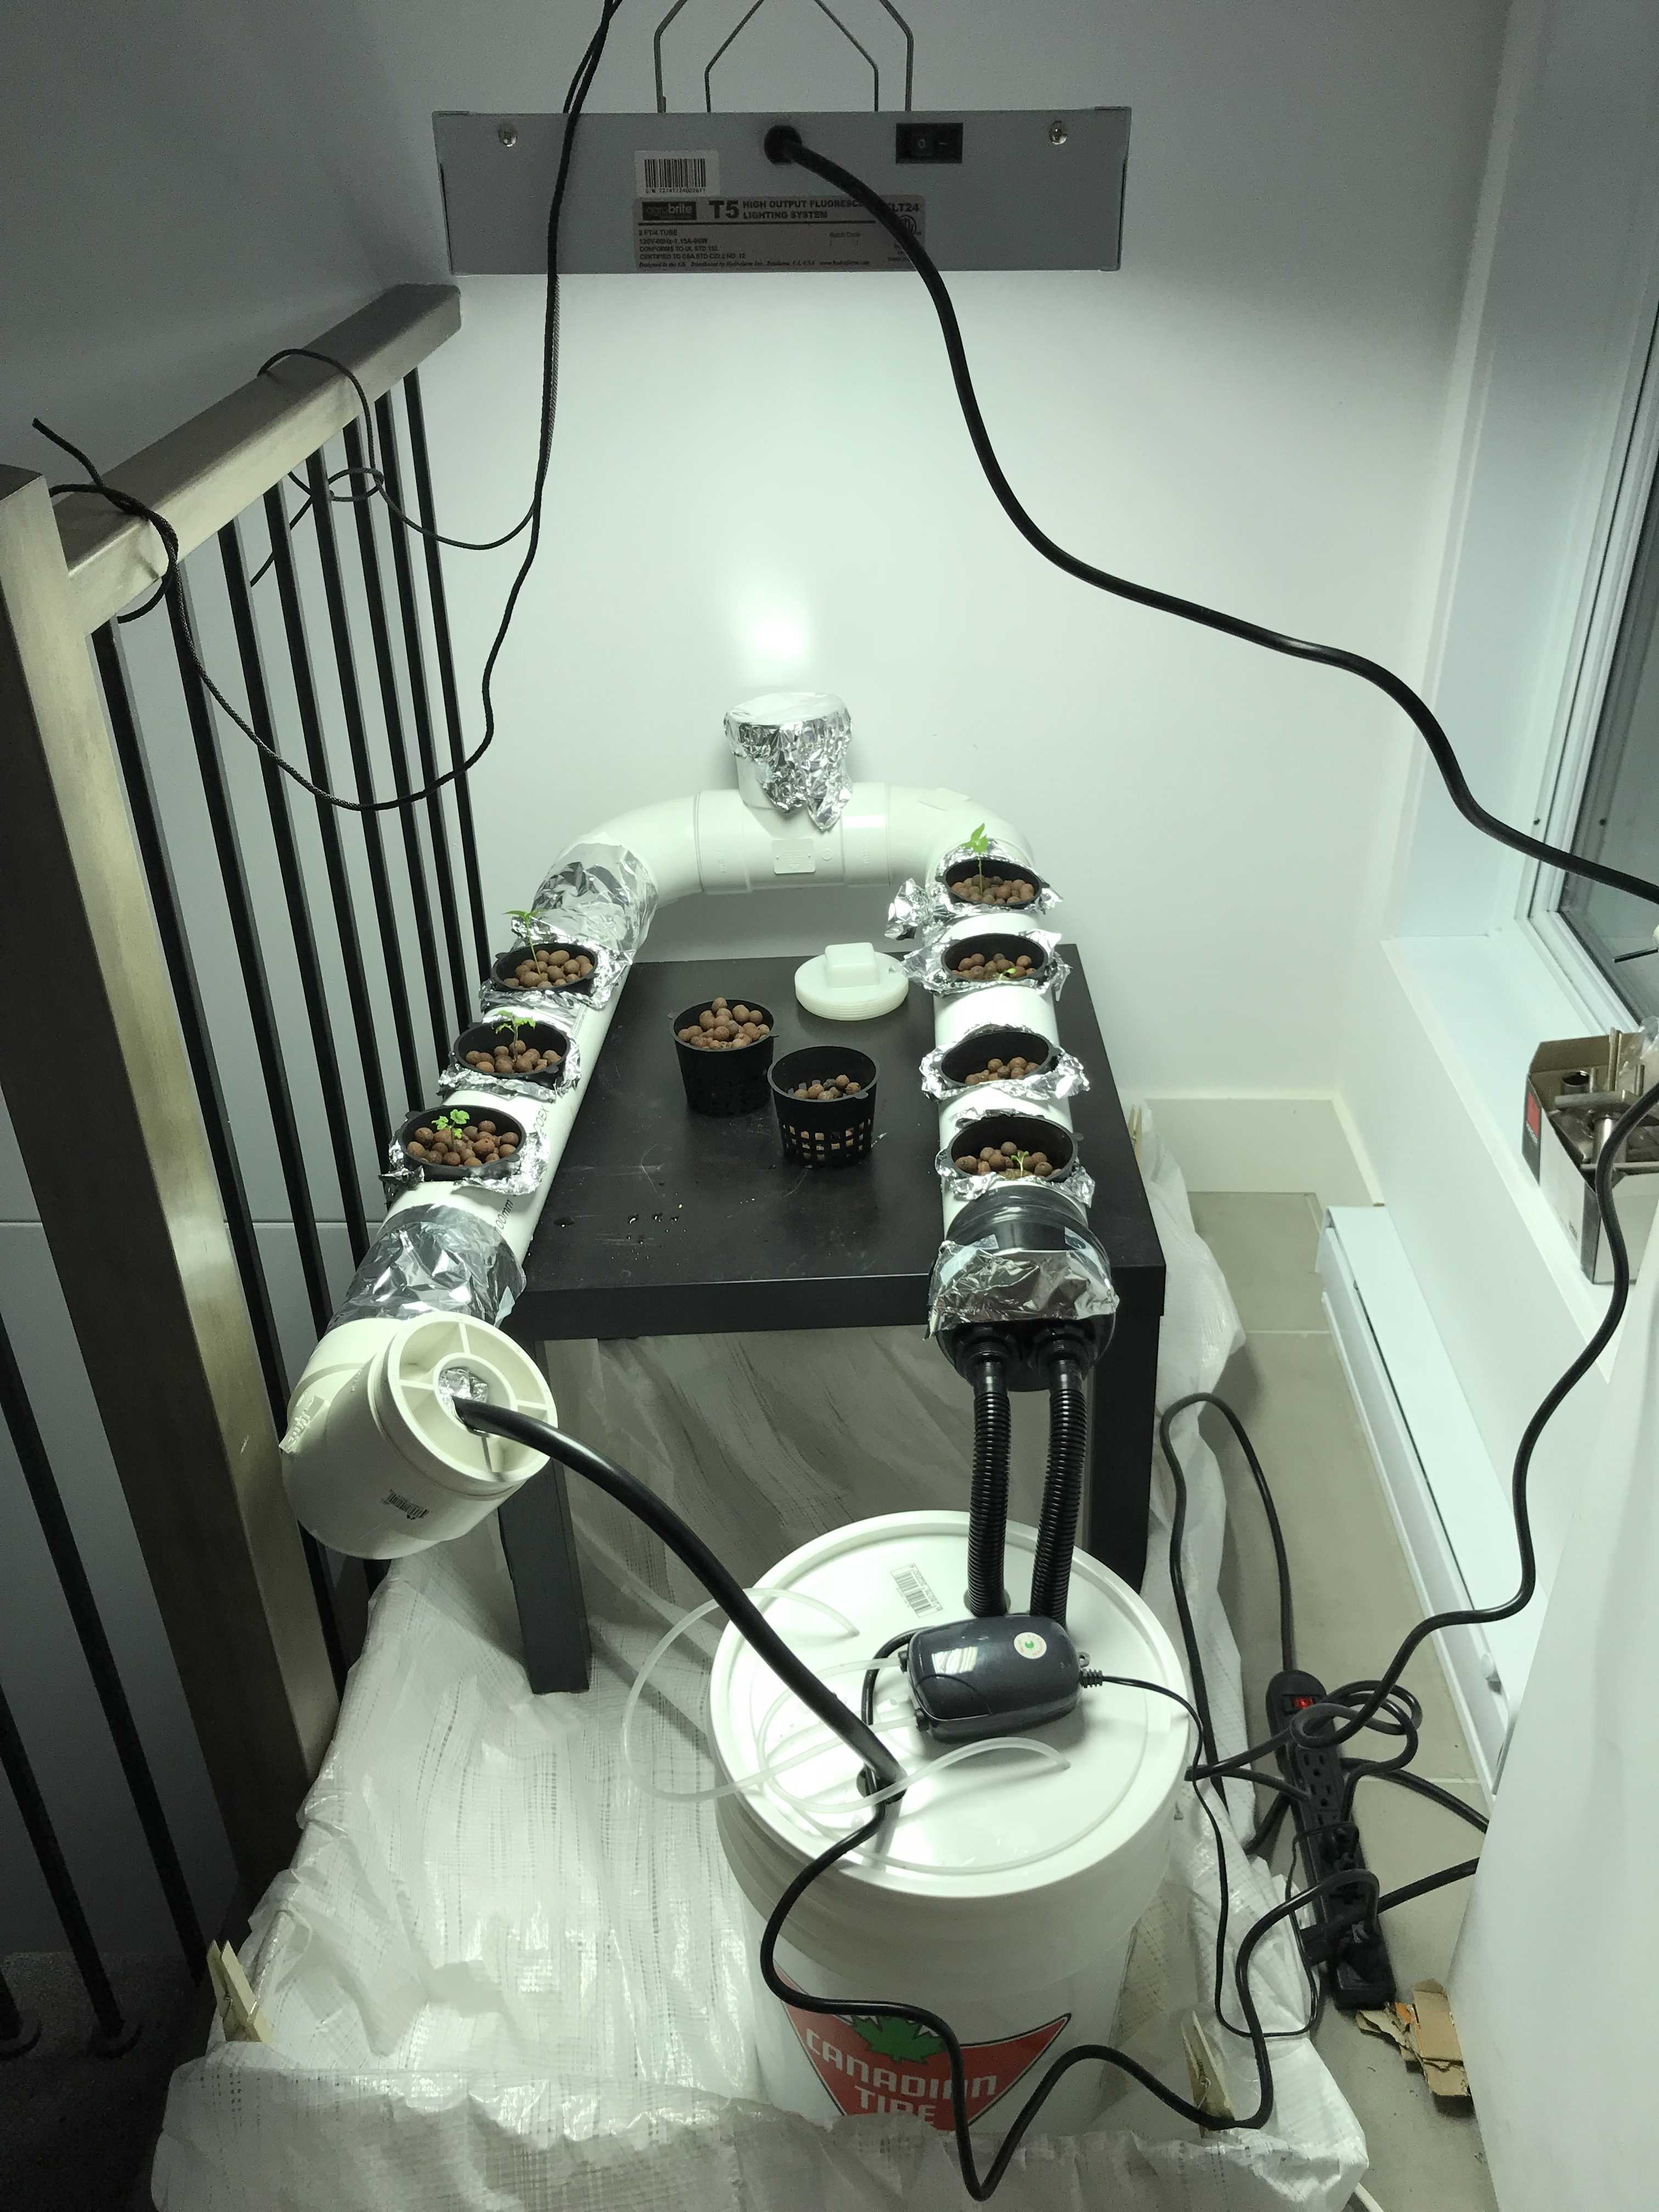
I love plants. I’m not quite sure why, but over the recent years, it’s been a growing love affair; pun intended.
I’m lucky to have room on my rooftop to grow lots of veggies in the summer. I’ve been building up capacity and I’m now up to 7 irrigated containers. I even managed to grow corn that was 9+ feet tall during my first summer! I’m now engaged in a ruthless battle with our beloved squirrels over domination of the garden’s bounty.
However, each year as our Montréal winter drew closer, I watched, powerless, as my once strong crops wrinkled away. This got me interested in finding out what my options were when it came to growing veggies indoors, and that lead me to hydroponics.
There is a sustainable development aspect to all of this which I find quite interesting. Growing most of the food we need locally seems like something we will have to do as a society pretty soon. I’ve been a big fan of Lufa Farms, who have been pioneers in that area, ever since they started. There are similar initiatives in most major cities. This technology is even being put in containers that are then shipped to the arctic to grow fresh food in the most arid climate on the planet!
This post isn’t an exact step-by-step guide. There is lots to know and learn, and great resources already exist online. Here, I’m going to take you through my journey and point you to relevant resources along the way.
Post contents
- Hydroponics basics
- The plan
- Acquiring the parts
- Building the system
- Preparing the water
- The first residents move in
- Monitoring environmental conditions with a Raspberry Pi
- Growth history
- Lessons learned and next steps
Hydroponics basics
Let’s start with the basics: what’s hydroponics? Very simply, it’s a technique for growing plants without soil, by using water enriched with a nutrient solution. This technique has been around for a very long time. No need to do a hydro garden to grow veggies inside; I could have simply decided to grow veggies in pots filled with soil. But isn’t doing it the way NASA is growing food in space way cooler?? There are also advantages in terms of efficiency, like increased growth rate and less water usage.
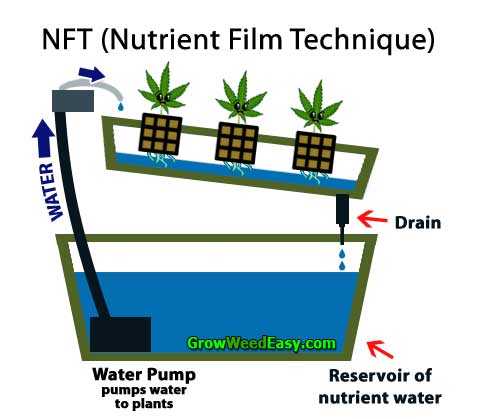
There are different types of hydroponics systems, but the basic idea is always the same. The type of system I built is a nutrient film technique (NFT) system. The diagram below shows the major elements involved.
The water reservoir is filled with water, enriched with nutrients and pH corrected. The water is then pumped into the system, where plants are placed in net cups. The water flows through the system, bringing nutrients to the roots of the plants, until it reaches the end and gets recycled back in the reservoir. An air stone is placed in the reservoir to pump air in the water to make sure it stays oxygenated (not shown on the diagram but required).
The plan
I first considered buying a pre-built small system like the ones from Aerogarden, but ended up not going for those because I was afraid the yields would be low and I would be locked in their proprietary seed system.
Then I took steps towards building a deep water culture system like the one described in this video. What made me reconsider that choice was thinking about the logistics of actually running the system. This is a pretty crucial point to consider depending on where you’d place your garden. Since the water needs to be changed every 1 to 2 weeks, the reservoir has to be either close or transported to a drain, emptied and filled up again. Depending on the size of the system, the reservoir can be quite heavy when filled with water. Living in a condo with mostly wooden floors, I considered the required water operations too complicated and risky. I imagined having the container on a shelf with wheels and rolling it to my bathroom to change the water, but that seemed like it would be too complicated.
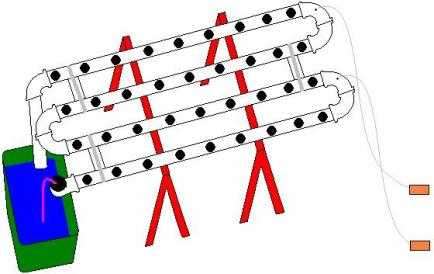
I then found a guide to building an NFT system with PVC pipes that seemed better adapted for my situation. Having the water reservoir separate from the system where the plants grow would make changing the water much easier as I would be able to simply carry it, leaving the plants where they are.
Inspiration for my system. Image taken from this post.
Acquiring the parts
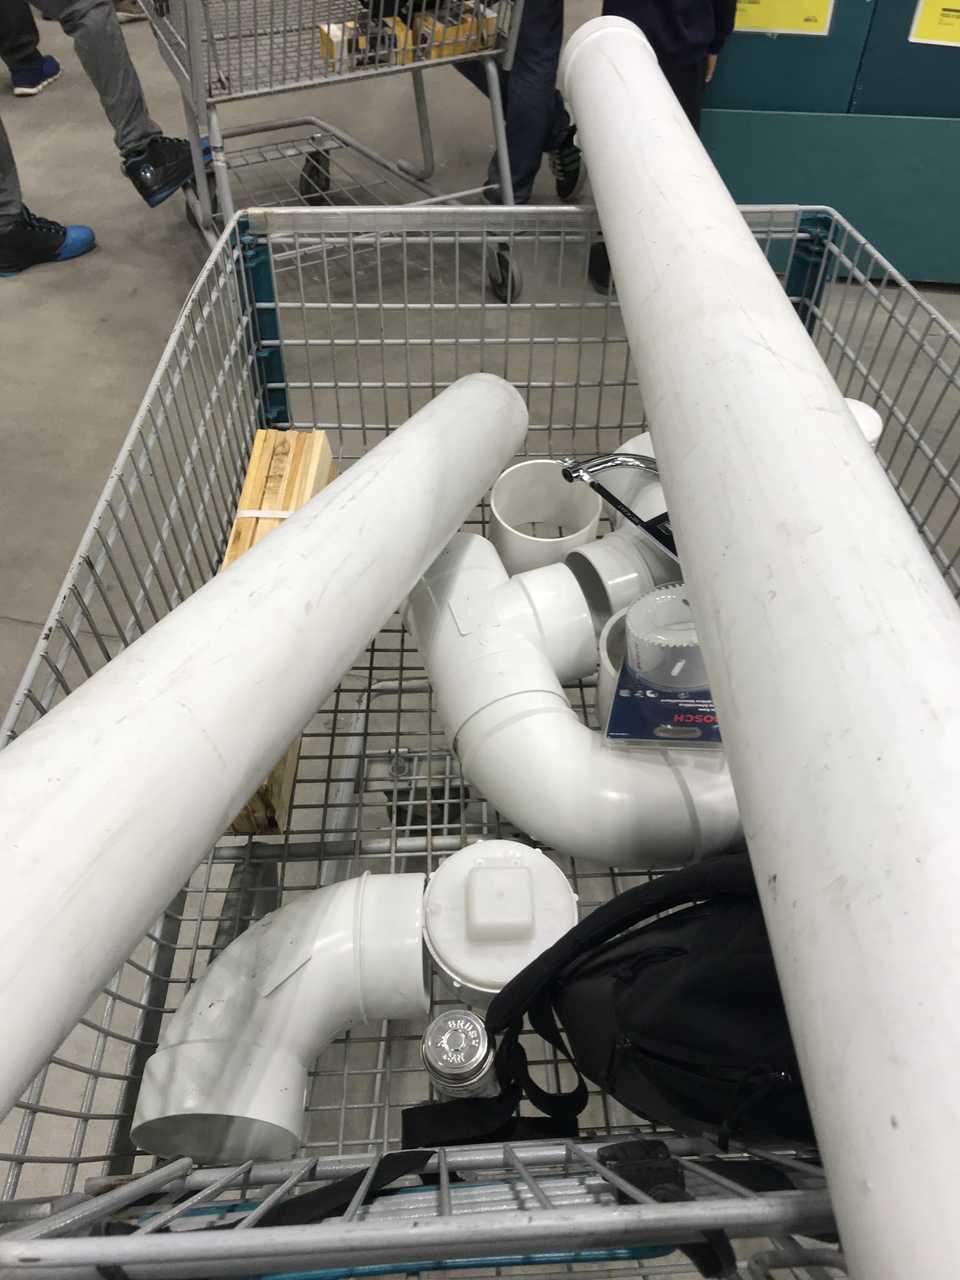
I got all the required parts from my local hardware store and online stores. I also dropped by a specialized hydroponics store and got some things from them, but I could have gotten them online.
Here are most of the parts that I ended up using:
System
- 10 feet long and 4 inches wide PVC pipe and fittings
- PVC glue
- Self-fusing silicon tape
- Hole saws: needed a few different sizes
- Net cups
Water
- 2 plastic buckets
- 3/4 thru hole drains
- Water pump
- 3/4 tube and 1/2 tube
- Air pump and air stones
- pH and TDS meters
- pH up/down solution
Hydroponics grow medium and nutrients
- Clay pebbles
- Rock wool or Rapid rooter
- pH up and pH down solution
- Nutrient solution. I bought a 2-3-2 solution from my local hydroponics store. You can get some from General Gydroponics online.
- Calimagic
Seed starting
Other
- Light fixture. There are a lot of articles on what type of light to get. I had originally bought this LED fixture, but it was much too strong and I thought the violet colour made it a bit awkward since I’m not placing the garden in a grow tent (example), but at the top of a staircase.
- Rope with adjustable height to hang the light fixture
- Smart plug with energy monitoring to control the light. You could get a much cheaper timer, but I wanted to be able to control it programmatically.
Building the system
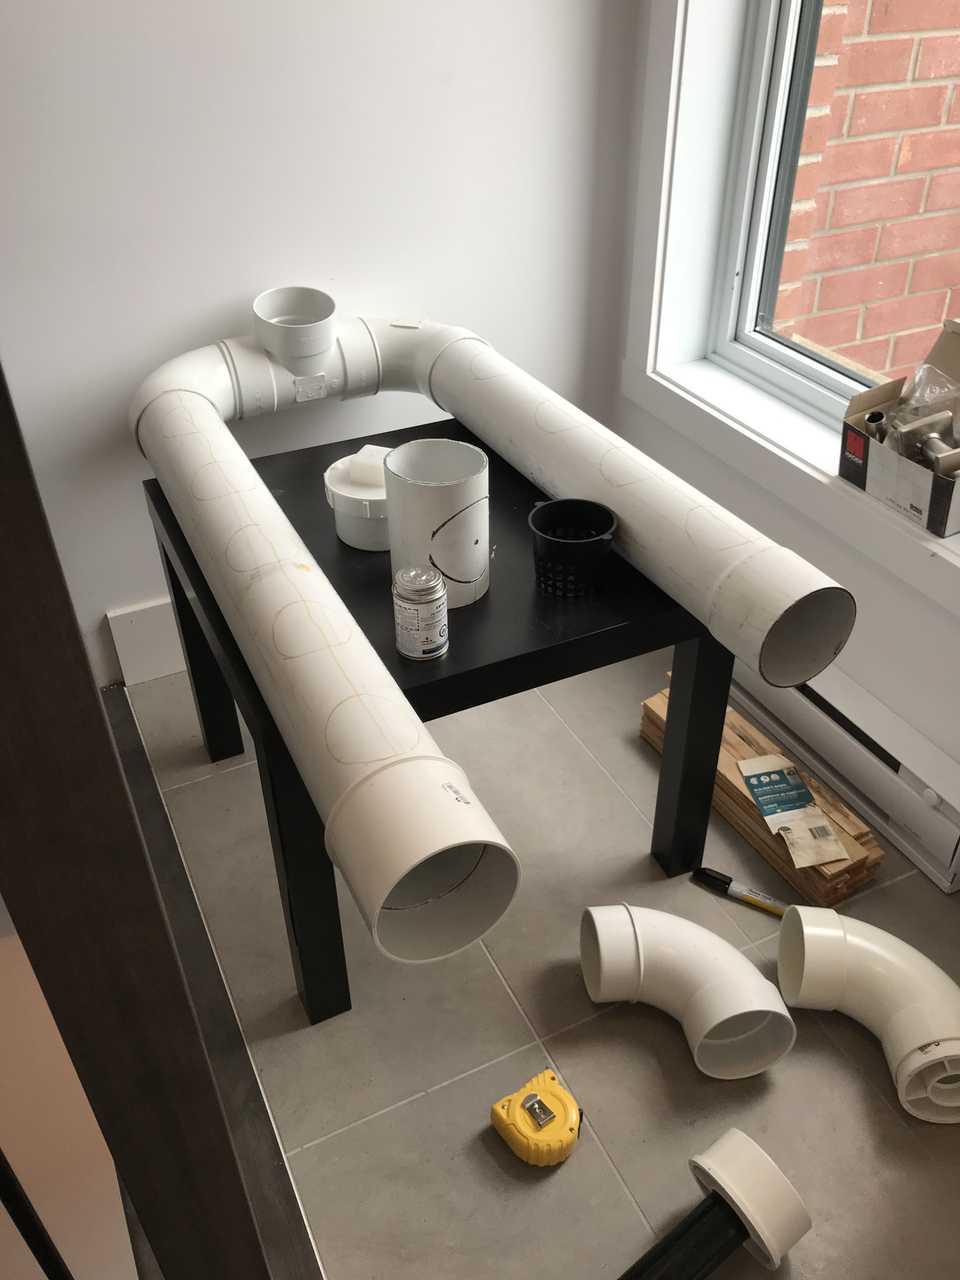
The first step is to cut the PVC pipe into sections with a saw and then drill holes at the right spots. You can use the net cups as guides and draw around them with a marker so you know where to drill.
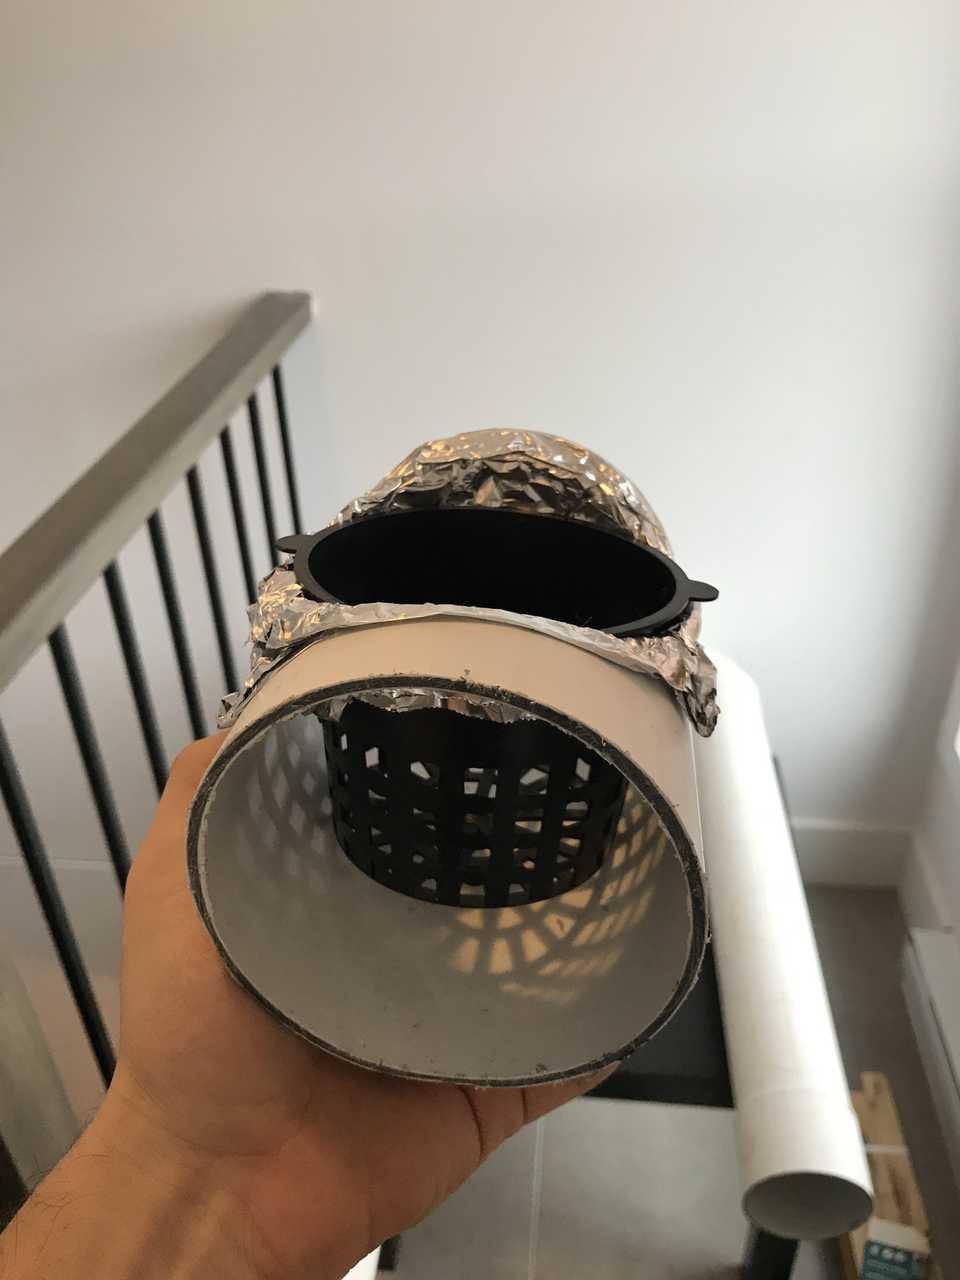
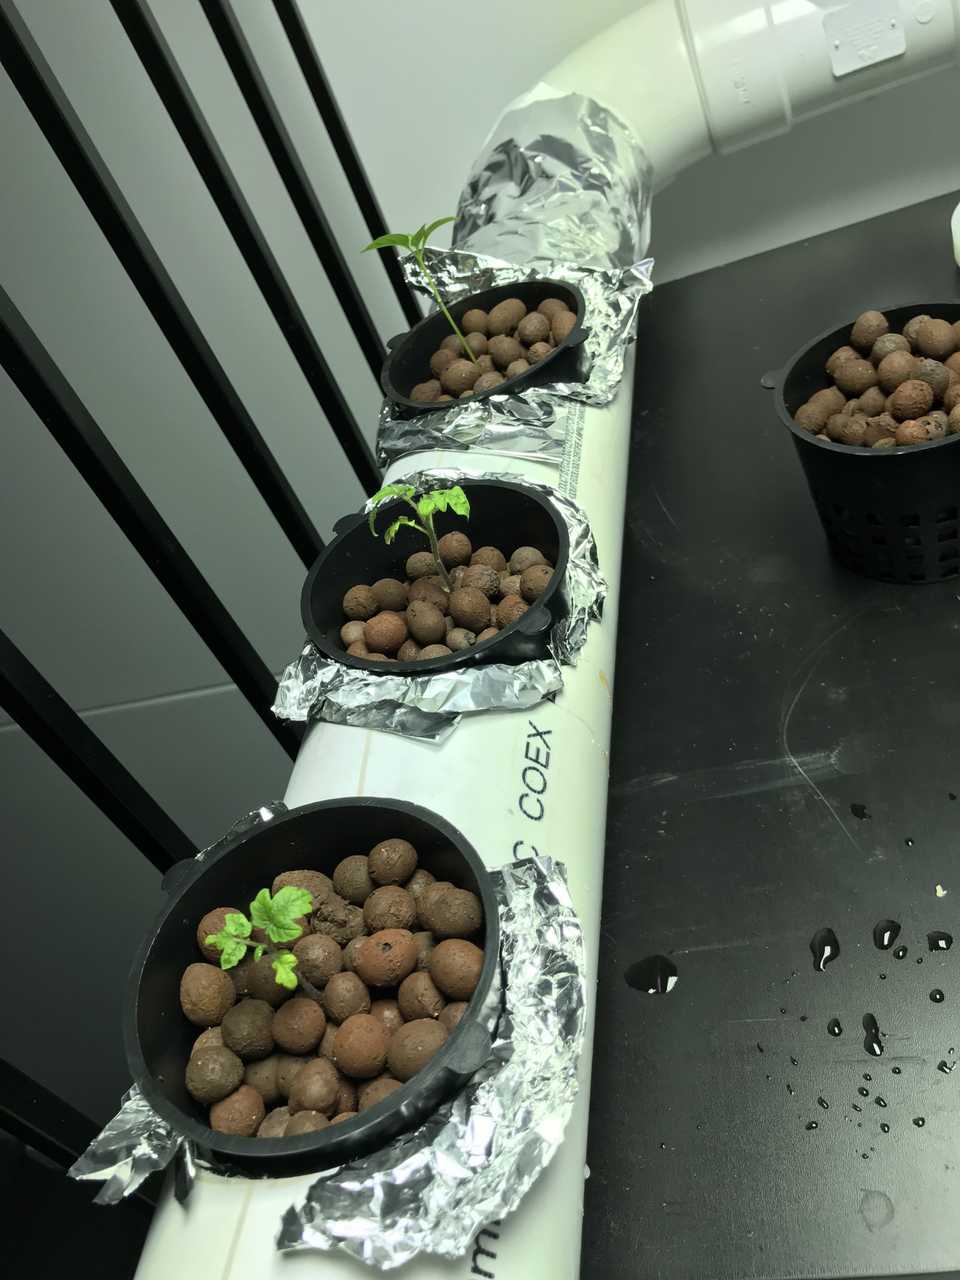
I had a small piece of unused pipe that I used to make sure the size of the whole saw matched the net cups correctly. The size was good but since I was using a round pipe, the sides of the net cups were exposed. I used aluminum foil to block off the light. I’ve seen some people use square fence posts instead of this type of pipe I used; more on that later.
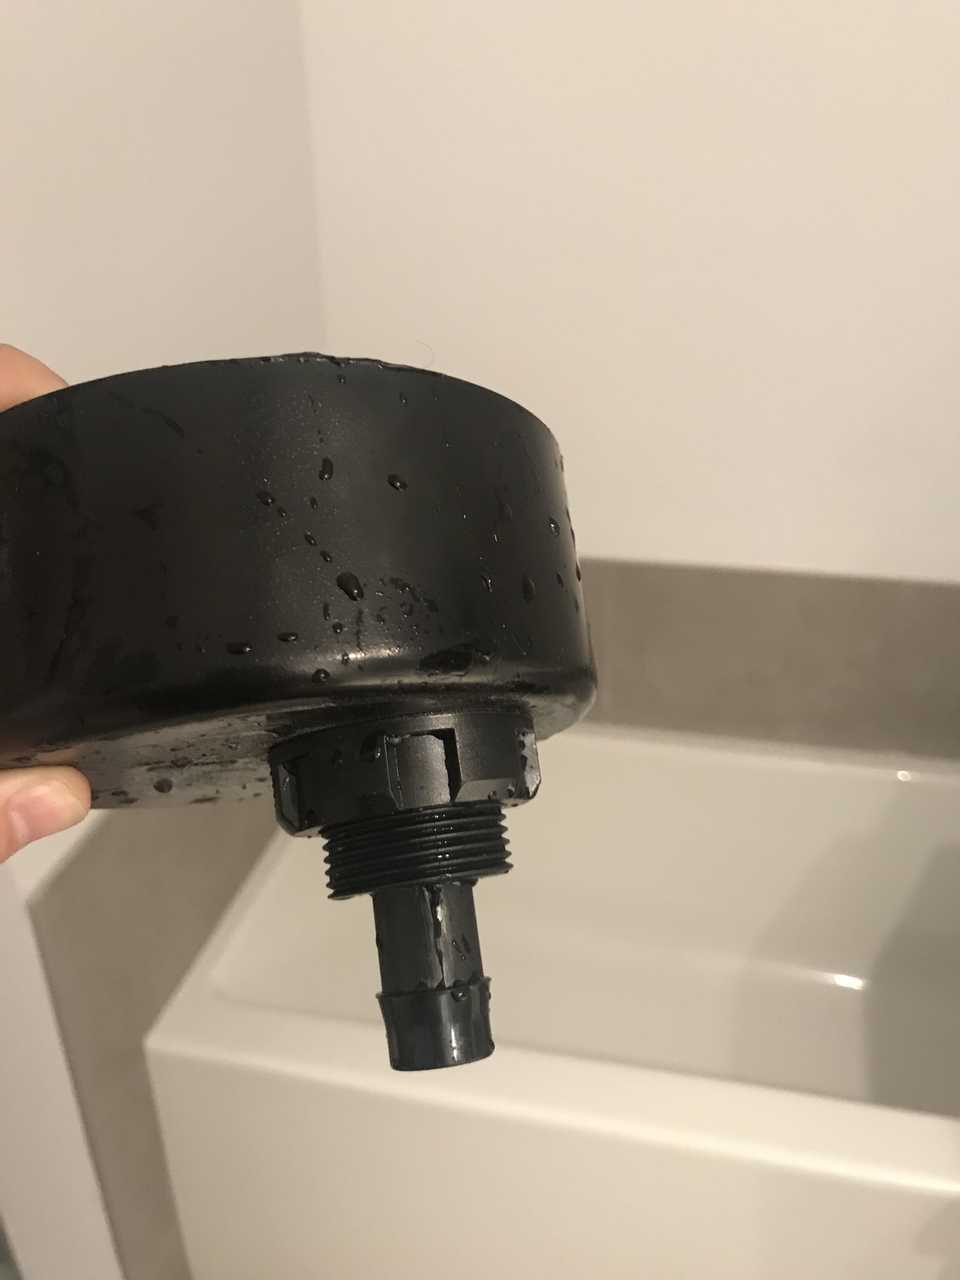
Then I put a drain in the PVC cap by drilling a hole using a smaller hole saw then for the net cups:
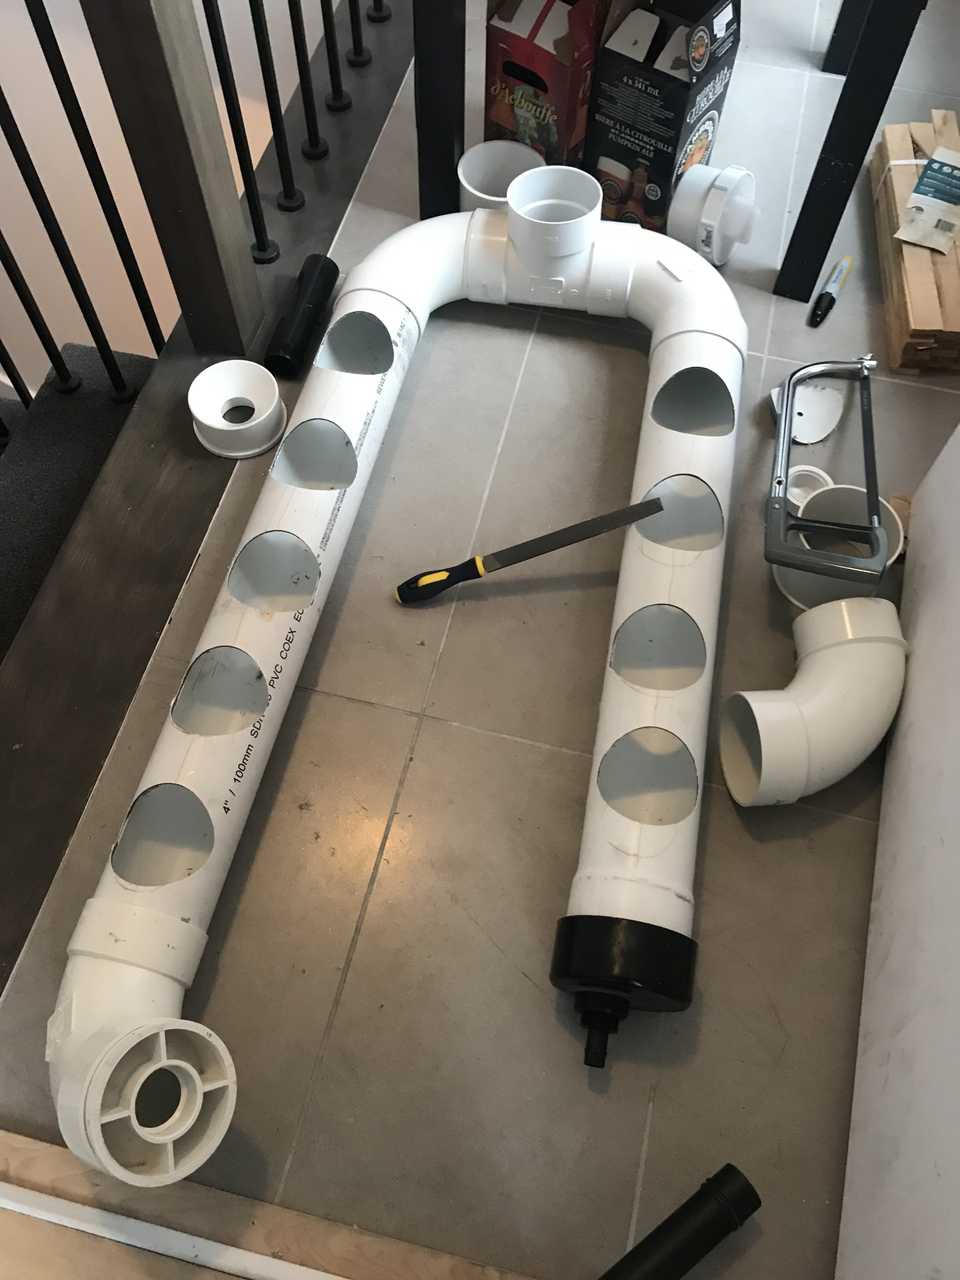
The next step was to drill all the net cup holes. Drilling with the hole saw makes a pretty huge mess. You’ll get little pieces of plastic everywhere. I highly recommend using a file to finish the job cleanly and then properly cleaning the inside of the pipes so that there isn’t any plastic piece left inside. That will prevent any piece from making its way into your water pump later on.
At this point I could assemble the whole thing by dry fitting the different pieces to make sure it was all good:
Then came the time to glue the different pieces together so that no water leaked out. Watched some more Youtube and got going with the glue.
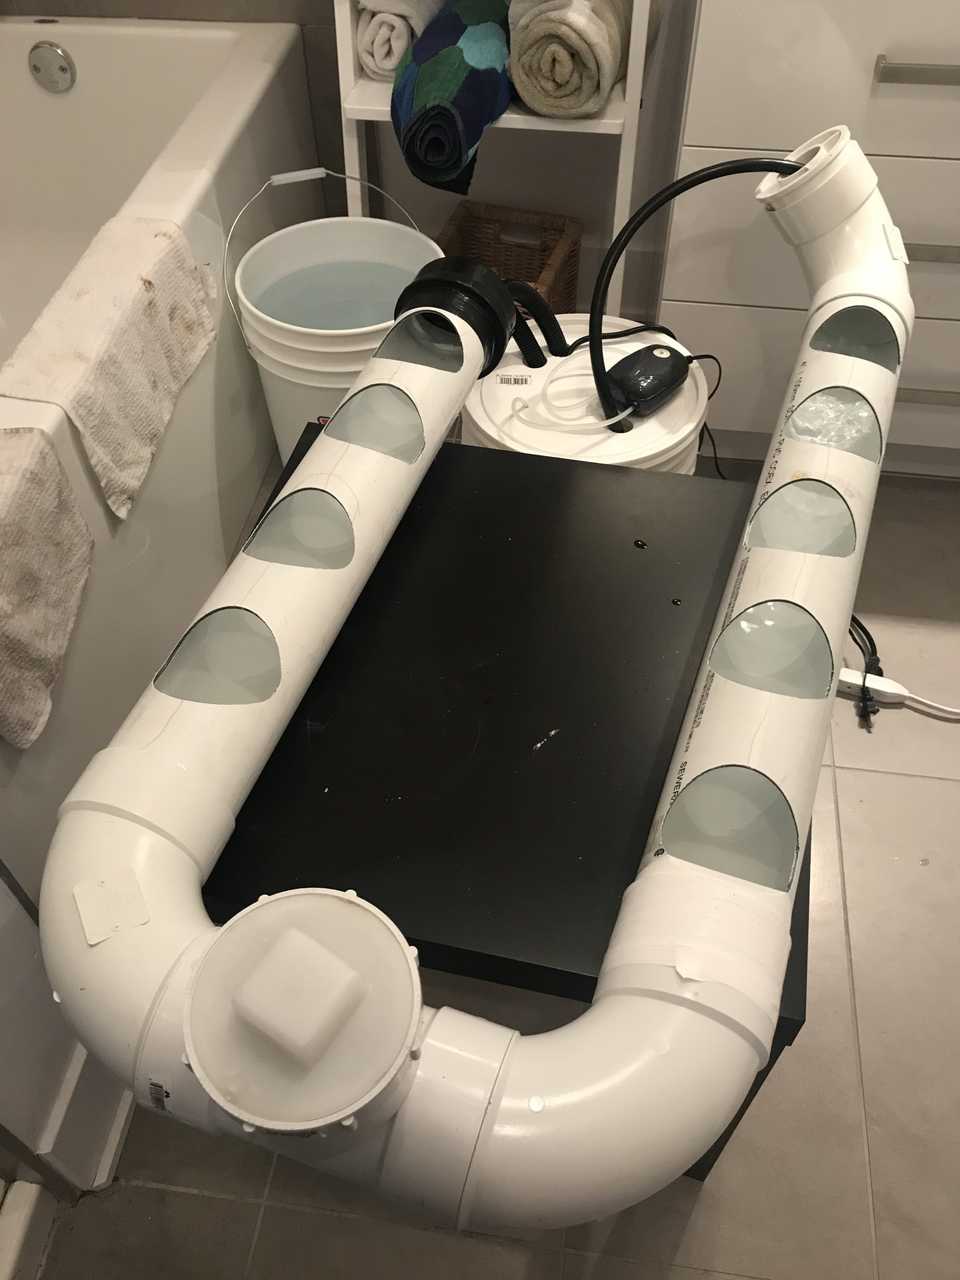
Moved the system in my bathroom and put it in the bathtub so I could test it out with some water flowing through it. It seemed to be doing OK, which was somewhat of a surprise. Next step was a live-fire exercise: running the system with water pumped from the reservoir and having it drain back out.
Unfortunately, two problems became very apparent. First, I had leaks in my PVC joints. Second, the pump was too powerful for the capacity of the drain that I had put. This meant the pump was emptying the entire reservoir in the system and would eventually cause the water to overflow as well as burn out the pump once the reservoir emptied out. Even setting the pump to its lowest capacity was too much.
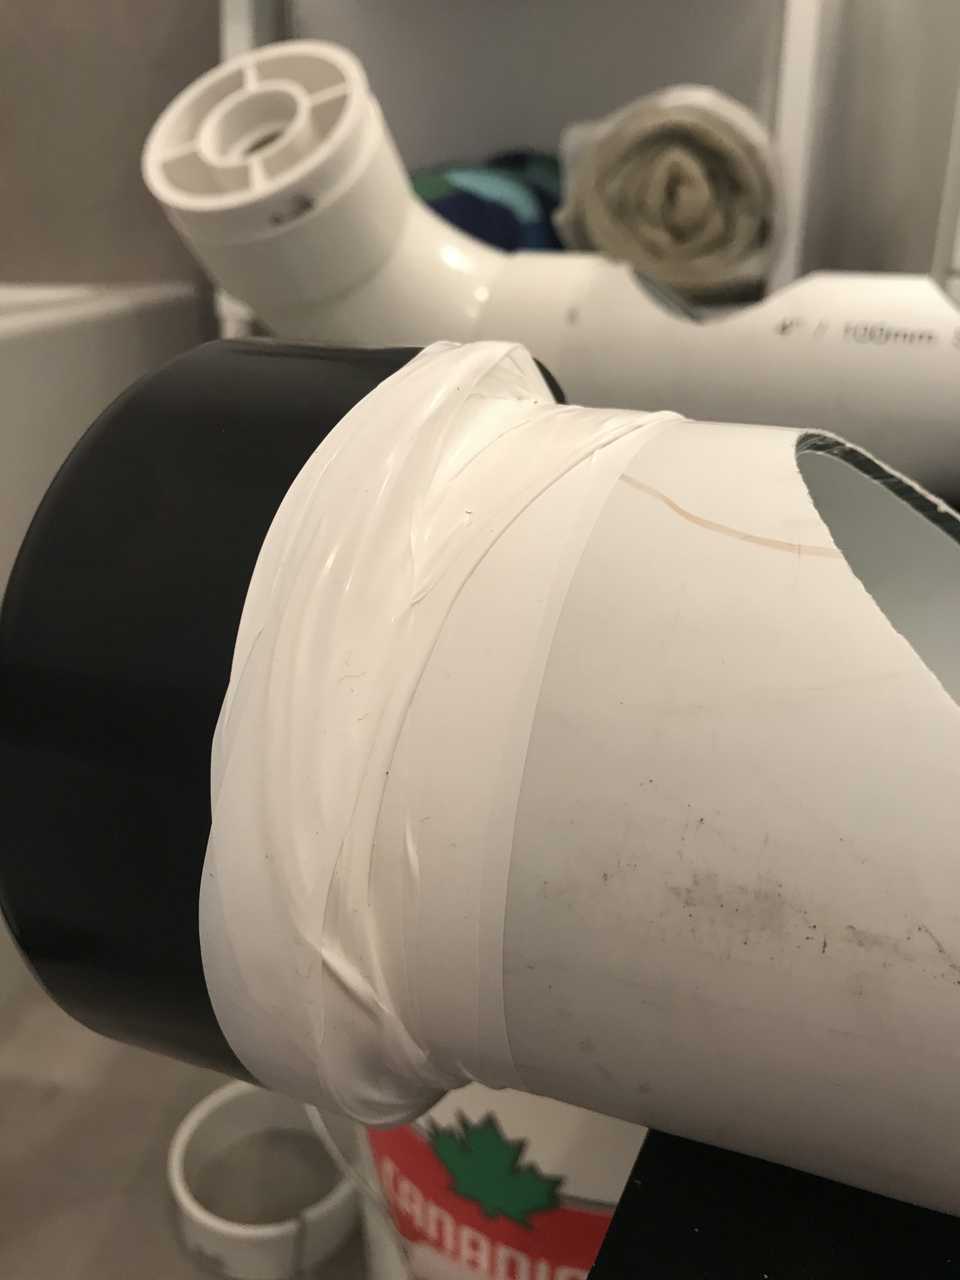
For the leaks, it was a bit tricky. My normal job is working in computer science, where mistakes can often by fixed by undoing with a simple ctrl+z. Things aren’t as simple when gluing plastic pipes together. One option was to saw off the joints and redo them, which would reduce the size of the system and wasn’t ideal at all. The second option, which I ended up doing, was to apply self-fusing silicon tape around the joints. But putting a generous quantity over the problematic joints, it took care of all the leaks!
For the overflow problem, the ideal solution would have been to put in a bigger drain, but again, since the PVC cap was glued on, I would have had to saw it off, put a new one, install a bigger drain, which I didn’t have… So the fix was to put a second drain right next to the first one as I did have that part.
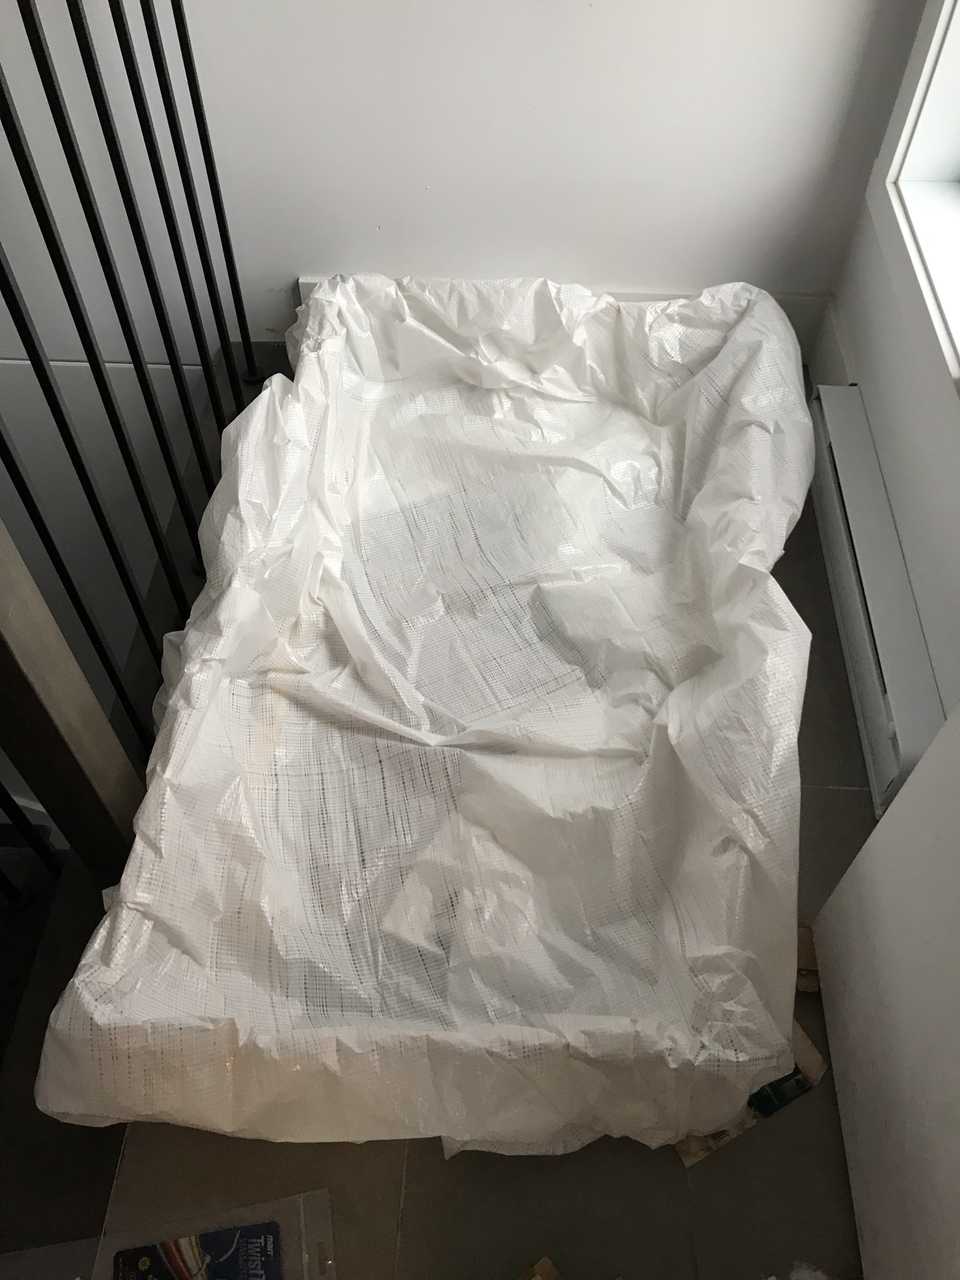
At this point the system was good to go. But I was a bit scared that something unforeseen could go wrong and water would leak out. Since I’m on the top floor of a condo building, you can understand that it is not an acceptable scenario. I needed a contingency plan.
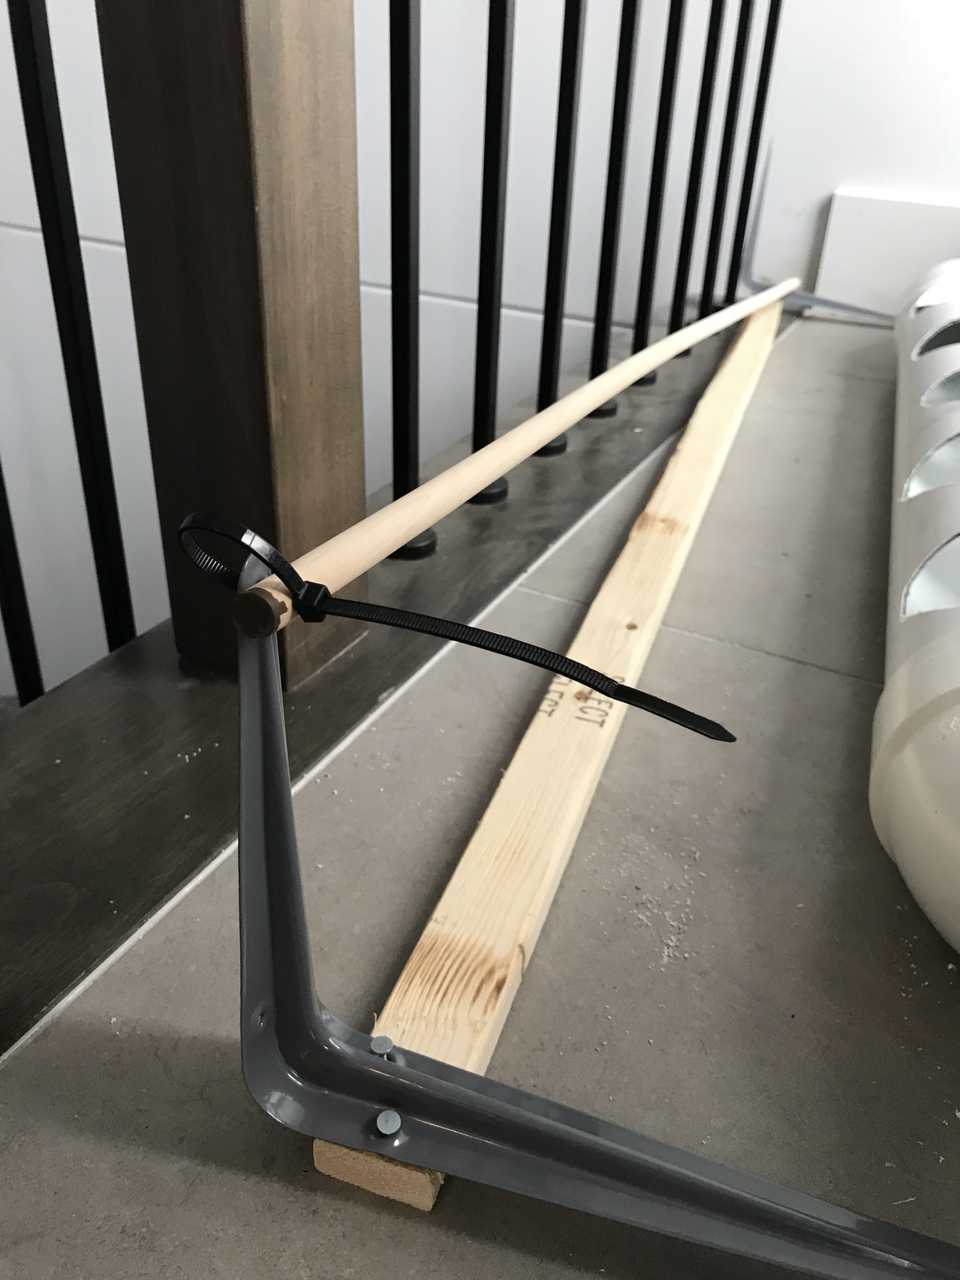
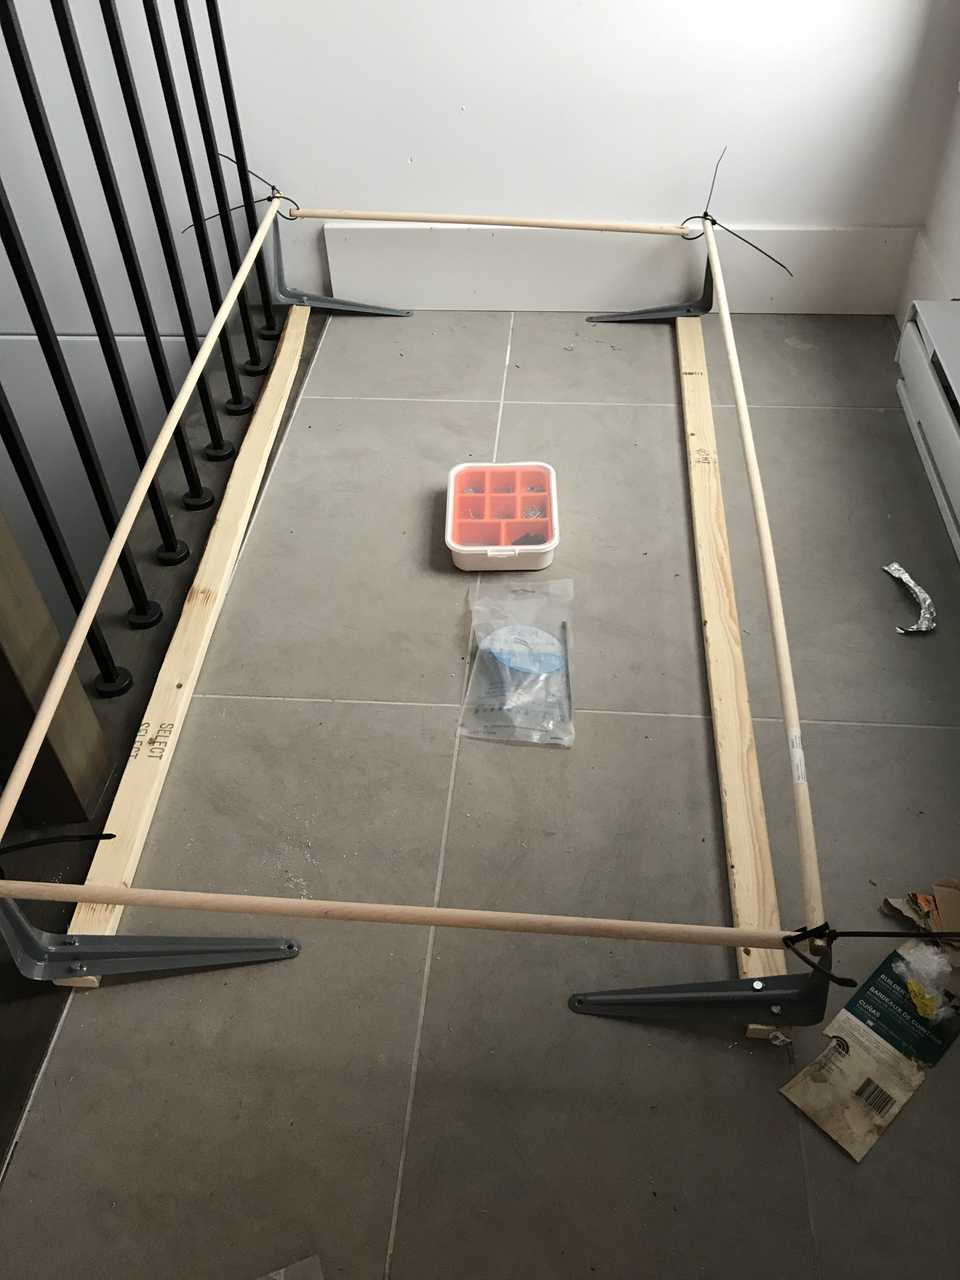
I thought of how I could put some kind of containment system in place. I was inspired by small kid’s swimming pools, and decided to build a custom basin into which I could place the whole hydro system. If something were to break and all the water leaked out, it would be completely contained within the basin. The reservoir only contains 14L of water, which is not a huge quantity.
Went back to the hardware store to get some wood, metal shelves supports, tie wraps and a tarp.
Et voilà. Water shields up!
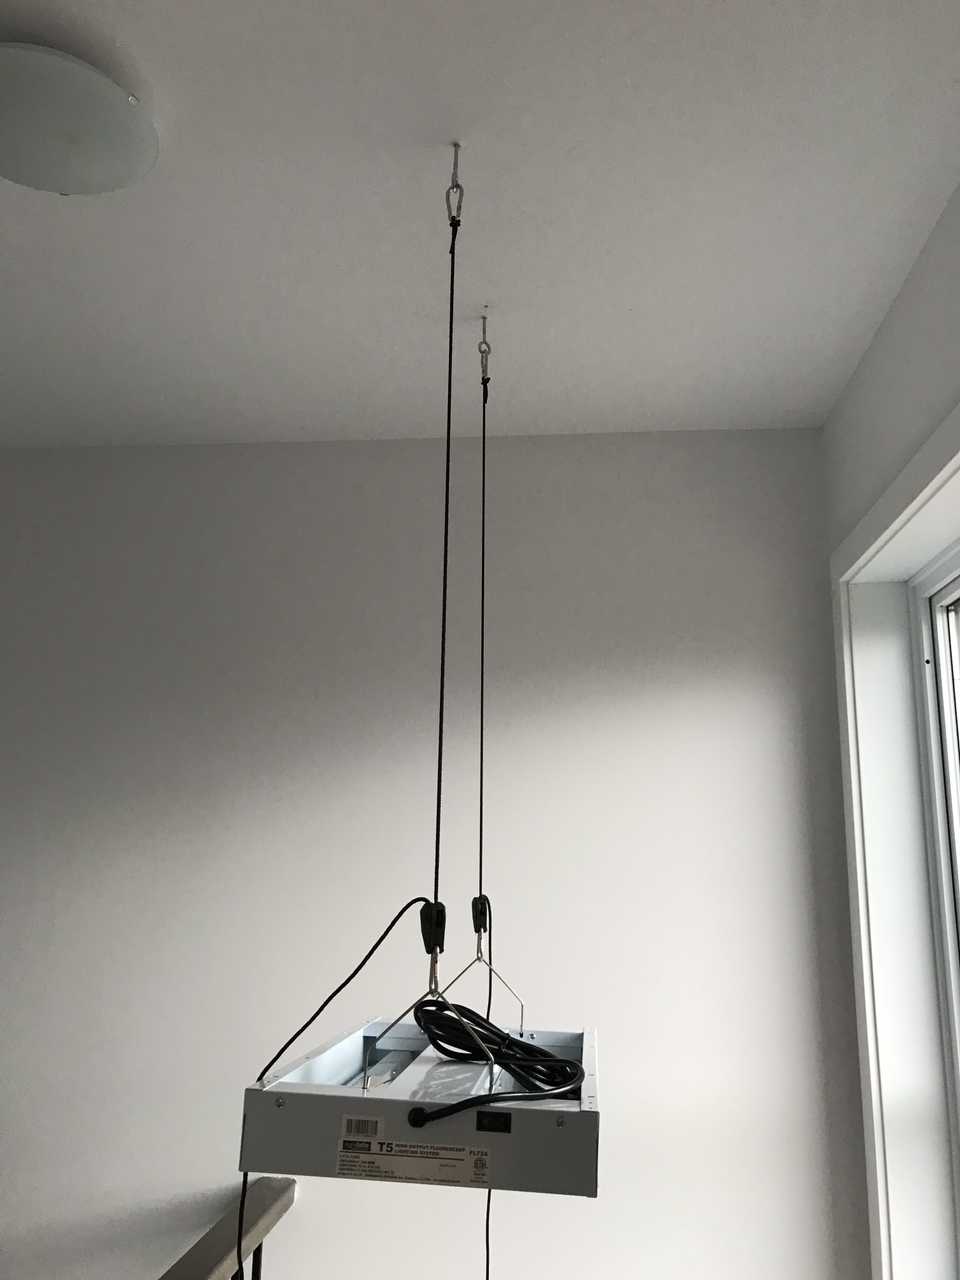
The final step was to hang the light fixture. Because I was placing the garden at the top of a staircase where I didn’t care too much about the look of it, I simply screwed some hooks in the beams in the ceiling and hung the lamp using adjustable ropes with ratchets.
Preparing the water
A little preparation needs to go in the water. I’ve used tap water for the garden, even though there are recommendations online on using distilled water, or water that went through reverse osmosis. The reason is that tap water contains more chemicals and minerals (ie: chlorine) that you might not want in your garden. However, as I understood it, the important thing you need to do when using tap water is to let is standing, exposed to the sun’s UV rays, for about 24 hours. This allows the chlorine put in the water by the municipality to break down. For that purpose, I bought 2 identical buckets so that I could have the system running with the first bucket as the reservoir while the second one is filled with the replacement water. The buckets take turns being the reservoir.
Then you need to add nutrients. Some people optimize the type of nutrient based on what growth stage their plants are in. So one type when they’re simply growing and creating roots, and another when they’re producing fruit. I’m not that sophisticated yet and I’m using a simple 2-3-2 solution from my local hydro store. I also started putting in Calimagic solution as well after about 6 weeks in an attempt to help out my tomato plants that didn’t look too happy. Simply follow the instructions on the bottle in terms of quantity.
The final step is to control the pH, with a pH up/down solution and your pH meter. I try to aim for a pH of about 6, based on the many guides online. The pH up/down solution is pretty concentrated, so I use pipette for greater control.
I haven’t paid too much attention to the PPM readings up to now so I can’t report much on that front, except that I’m getting OK-ish results without paying attention to it :)
The first residents move in
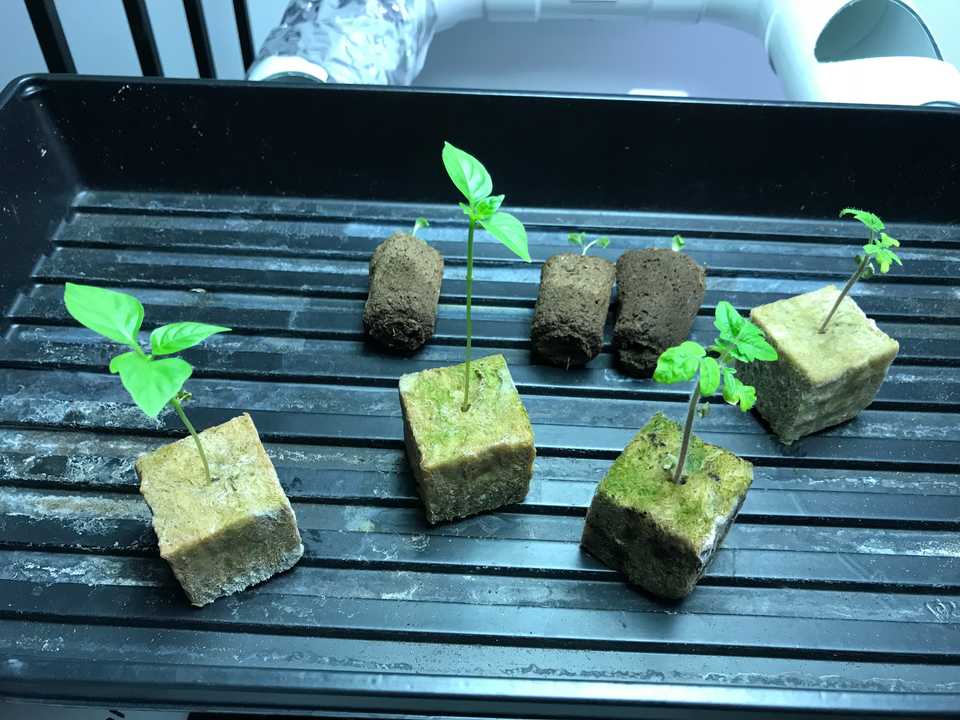
Because the plants will be growing without soil, we need to start them from seeds into a growing medium. The most popular one is rock wool cubes (yellow cubes below). The cubes are created from rock and sand and are similar to mineral insulation used in houses. Because of their popularity, I started with them. However as I read more on the subject, some argued that they were not very eco-friendly, so I decided to try alternatives. I’m now using rapid rooter starter plugs (brown cylinders), that are made from compost.
Whichever medium you use, the idea is the same: hold water, air and our seeds. You need to start them in a little green house. This video explains how it’s done. I’ve found that using a heating mat helped a lot so I recommend getting one.
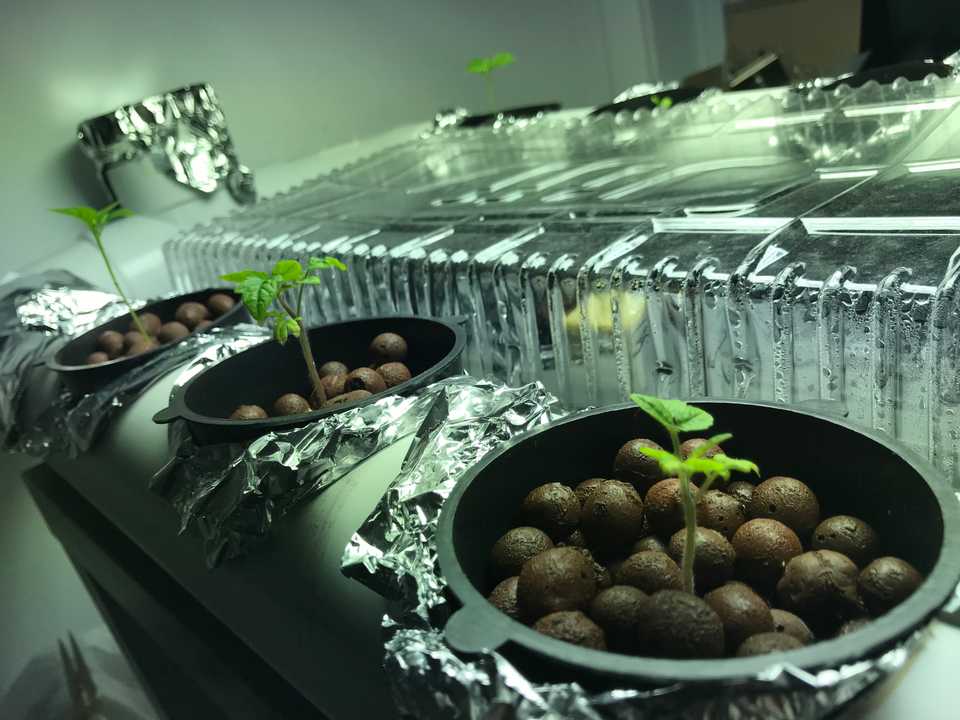
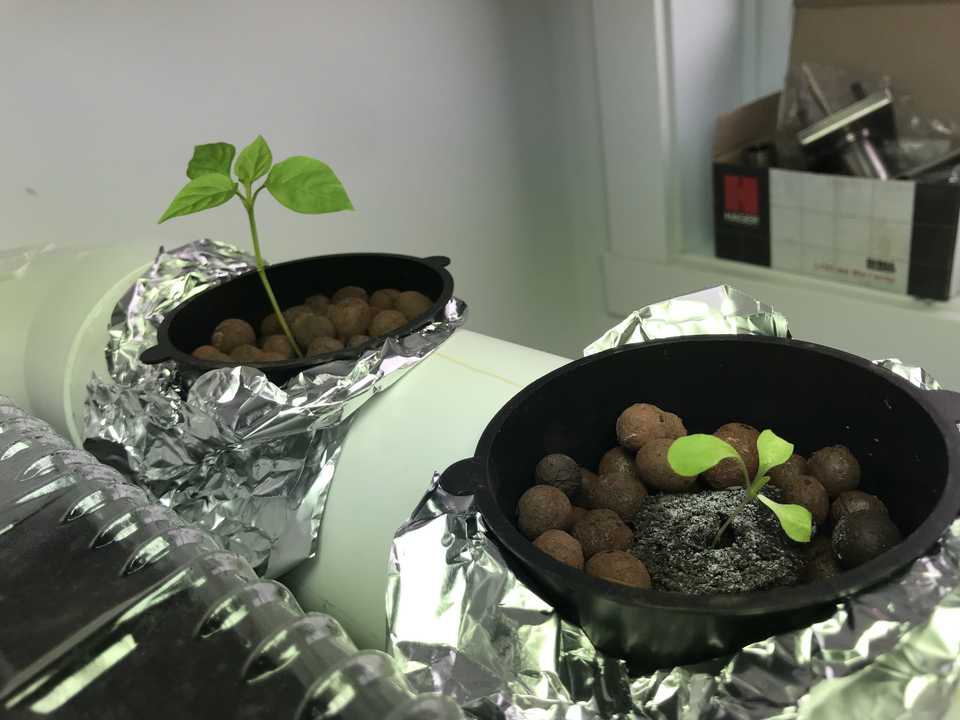
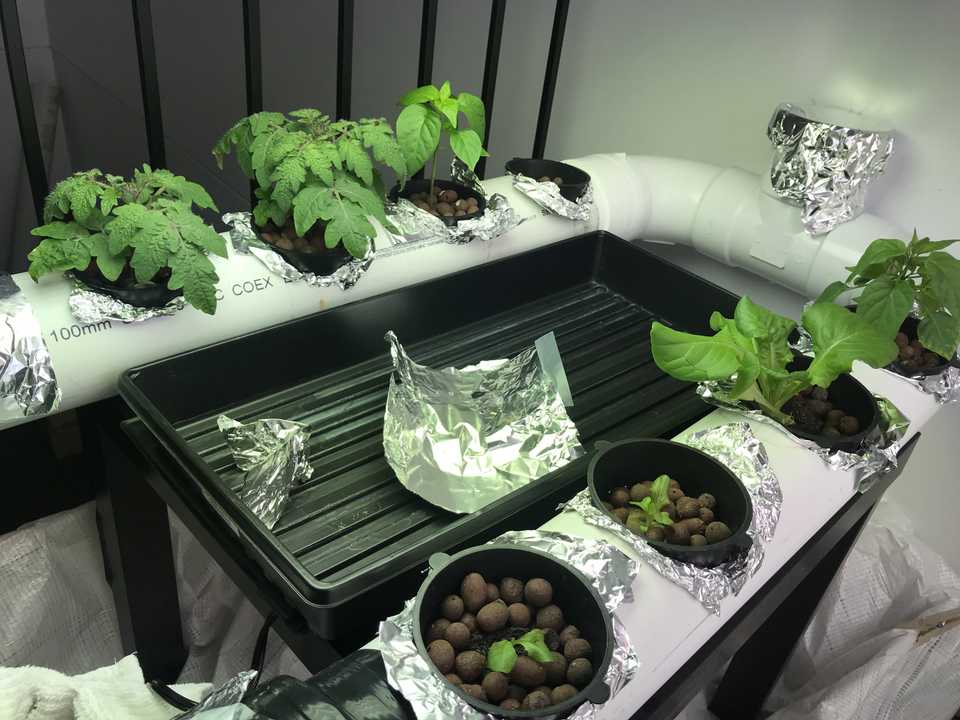
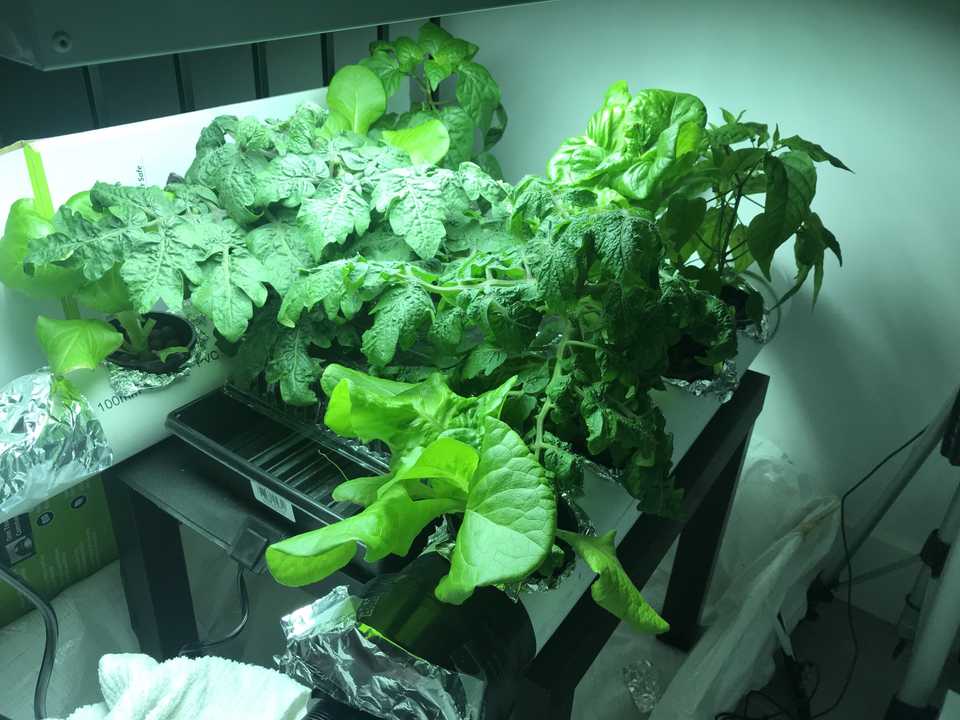
My very first batch was 2 tomatoes, 2 peppers and 3 lettuce. Once our little veggies are big enough, we can put the rock wool cube in a net cup and fill it with clay pebbles so they are held in place. You also want to prevent as much light as possible from getting into the system, which the pebbles also help to do. If light gets in, you increase the chances of having algae grow in the system.
With all our baby plants in net cups placed in the system with aluminum foil covering any remaining openings, the system was complete. I drilled holes in the reservoir’s cover to allow the different pipes though and we were good to go.
This is a video of the system in action:
Monitoring environmental conditions with a Raspberry Pi
My day job is doing machine learning and data science, so it was natural to think about how I could collect as much data as possible on the garden to track and automate things. One of the longer-term goal is to try correlating environmental conditions and whatever actions I’m taking with plant growth and yield. In terms of actions, everyone suggests keeping a journal, which I’m doing. But for metrics on the water, air and light, having something automated is much better.
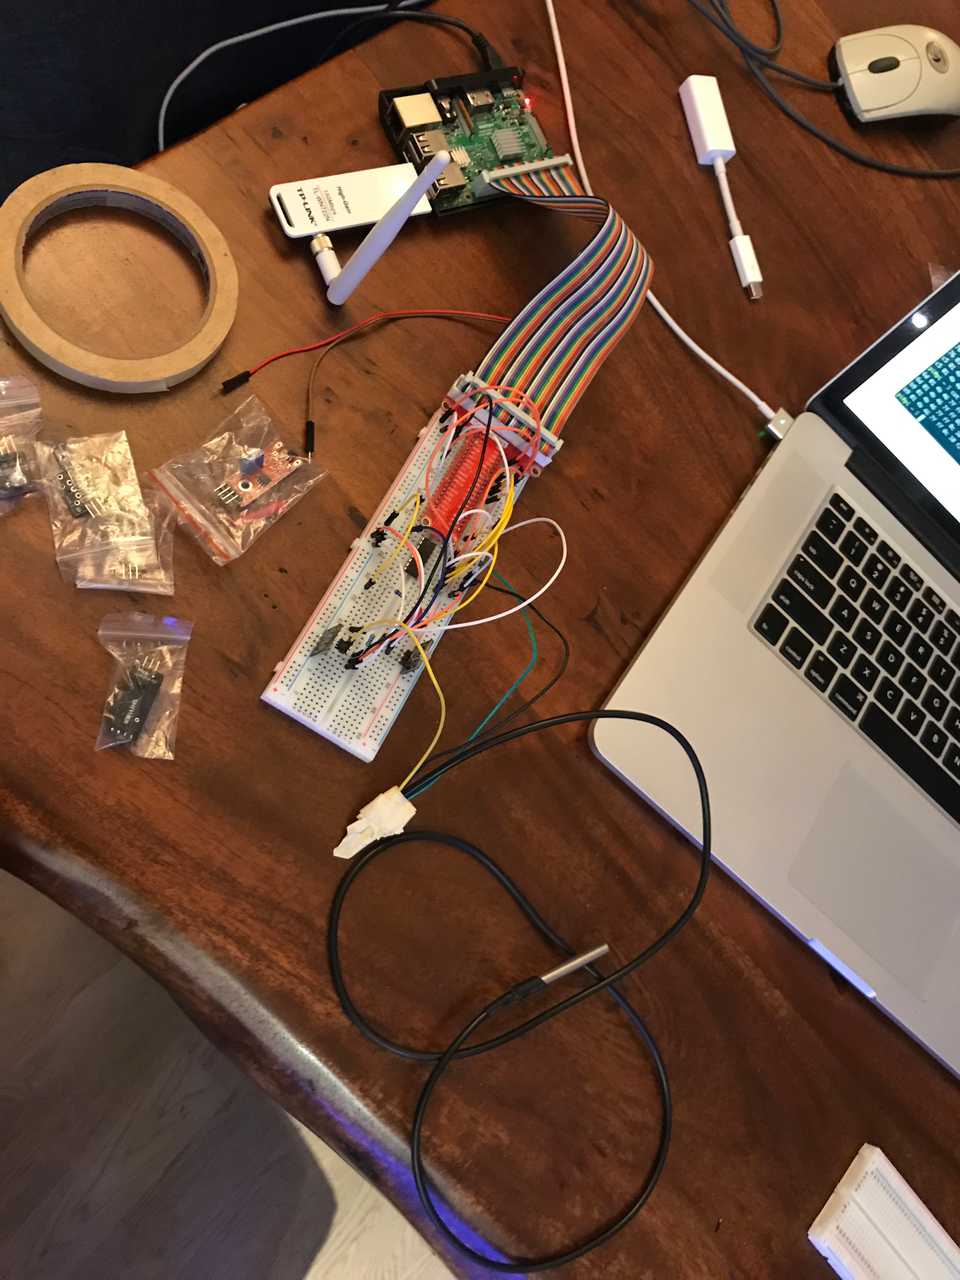
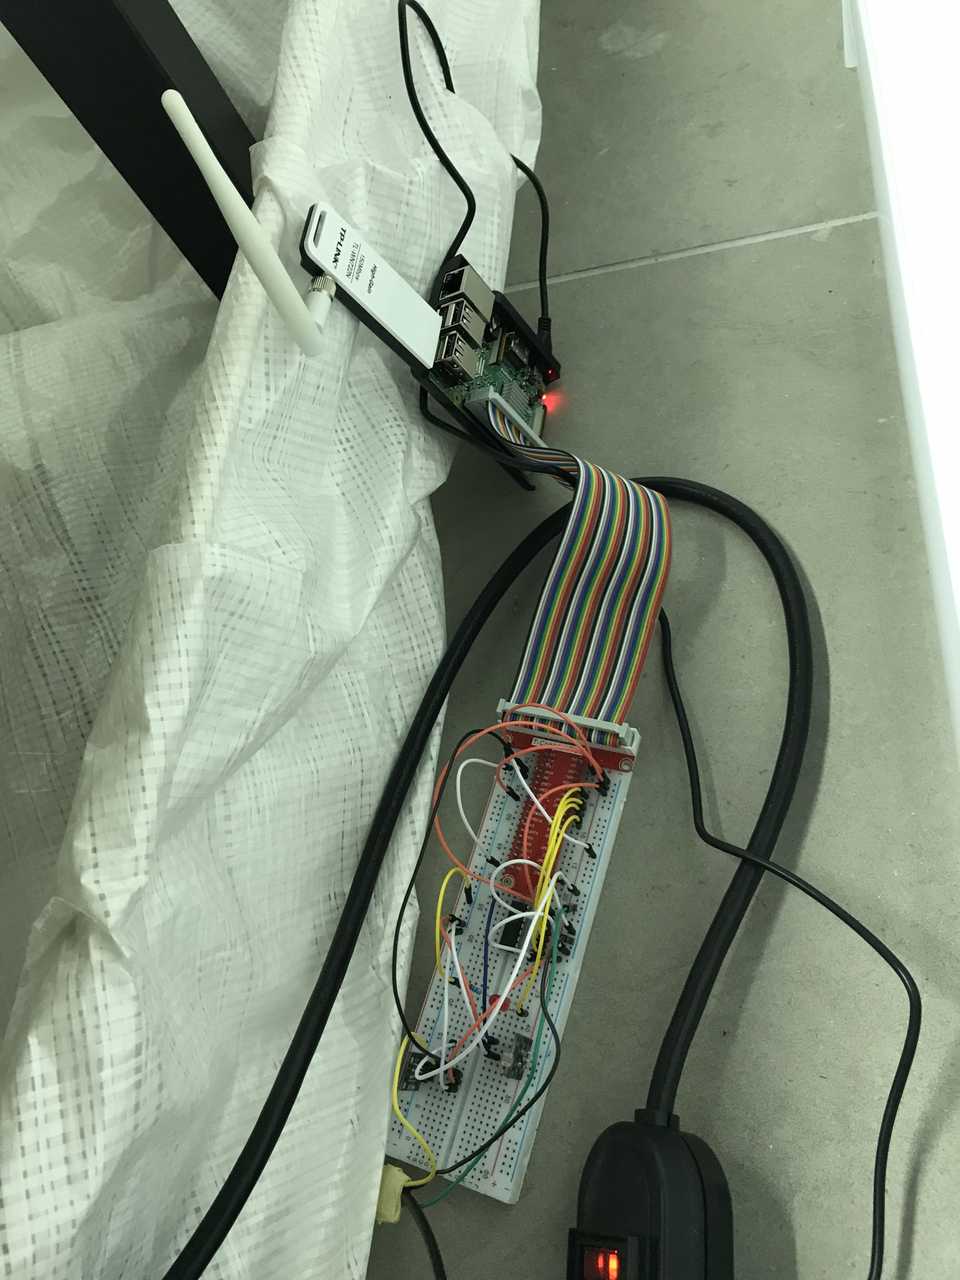
To monitor the environment, I put together a small monitoring rig with a Raspberry Pi. I’m not going to go into too many details on this, but since this was my first experience with a Pi, it’s not too complicated. I ordered a Pi, breadboard and a few sensors. The first ones I hooked up were the following:
- Ambient light sensor: KY-018
- Ambiant temperature sensor: DHT11
- Water temperature sensor: DS18B20
A small Python server runs on the Pi and exposes an API with the readings from the sensors. The script is available on Github. The server also pulls weather information from the Open Weather Map API so I can track what’s going on outside. I have a MacMini that runs Prometheus, a time series database, that collects and saves the time series data, and I setup Grafana to have a nice dashboard.
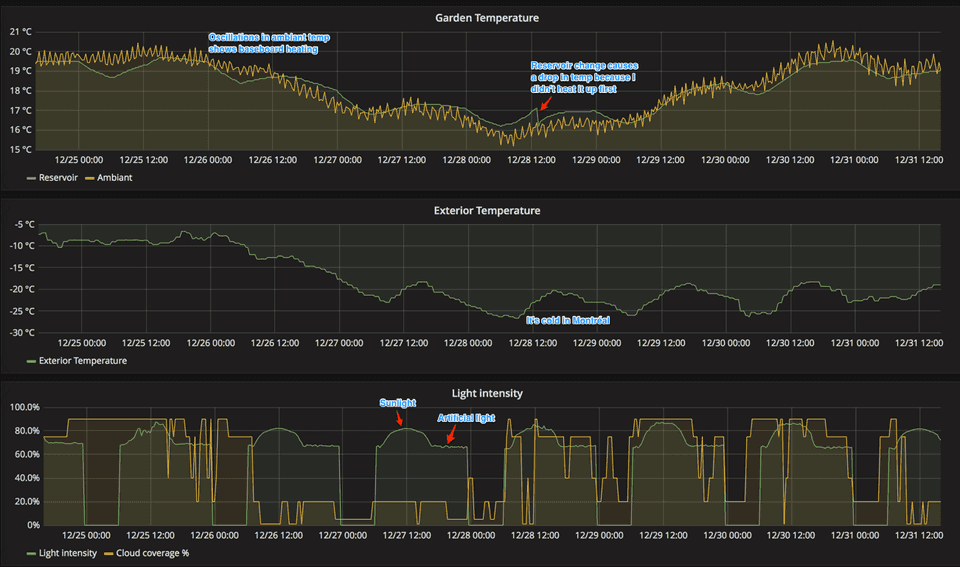
This is the result:
Some fun patterns:
- The oscillation in the room temperature (yellow line on the top graph) is the electric baseboard heating the room going on and off. I’ve got some wall insulation problems in that area of my condo, and the sensor is on the floor, so you can see the effect of the outside temperature on that temperature reading. The temperature at the level of the floor is very correlated with the outside temperature.
- There is a daily cycle in the reservoir water temperature (green line on top graph). By looking at both that graph and the bottom one that shows when the lamp is on, you can see that the temperature follows the cycle of the lamp. That was unexpected but makes total sense. The lamp heats up the water that is going through the PVC pipe, which in turn heats up the reservoir when it gets recycled. Because of the period this graph is based on, where the outside temperature was going down quickly, that pattern is harder to see, except for on the 25th (left-hand side of the top graph).
- On the bottom graph, looking at the green line which shows the light intensity, you can see the lamp opening before the sun rise, and staying on after the sun has set. During the day, you see a nice arc where the ambient light increases and then decreases, following the sun.
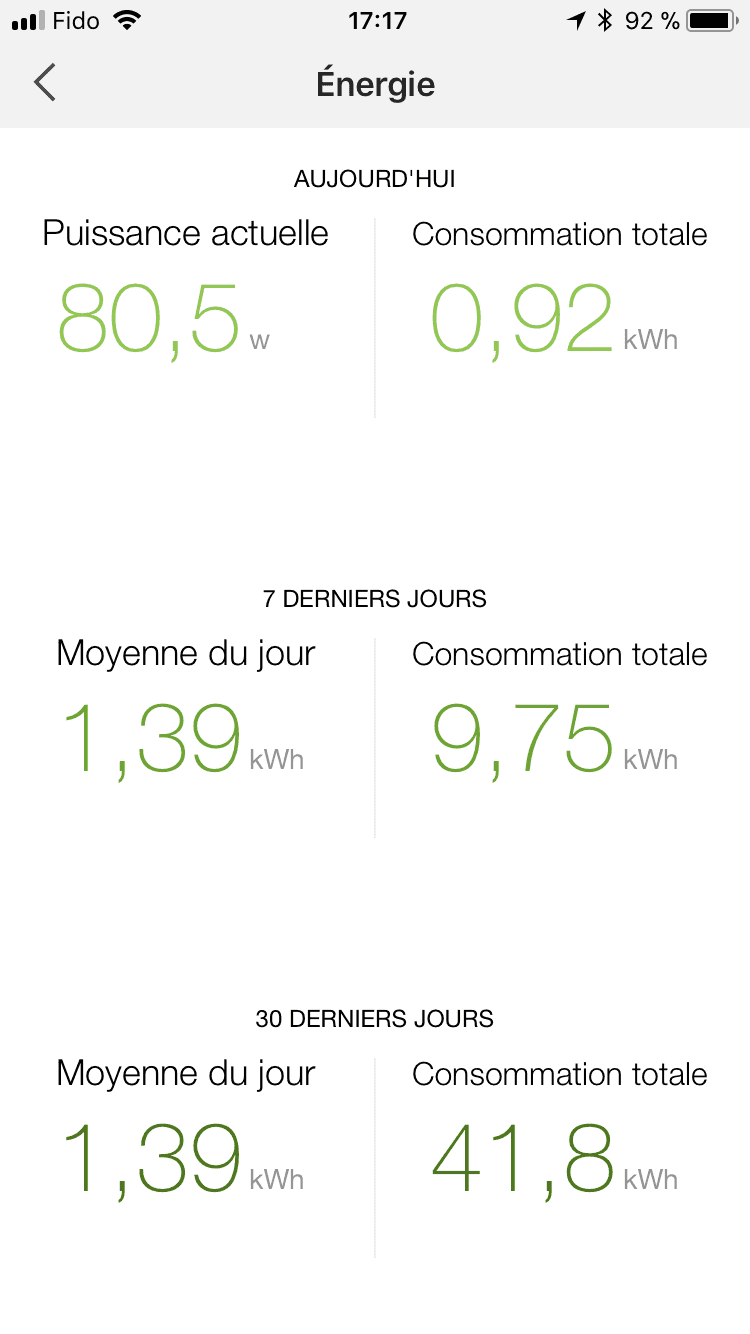
I also got a TP-Link HS110 smart plug with energy monitoring in order to track how much power I’m using. I also wanted to be able to programmatically turn the power off and on. I didn’t want to get into setting up a Pi-controlled relay, and there is an open source 3rd party library that can be used to control the HS110 so I went with that. As you can see from the screenshot, the light used a daily average of 1,39kWh, and the electricity cost in Québec is 0,0877$/kWh, meaning the cost of running the lamp was 3,66$ for the last month. Acceptable price for hopefully yummy tomatoes!
I configured the HS110 to turn on the light from 6:00AM to 11:30PM. Plants need to sleep too.
Growth history
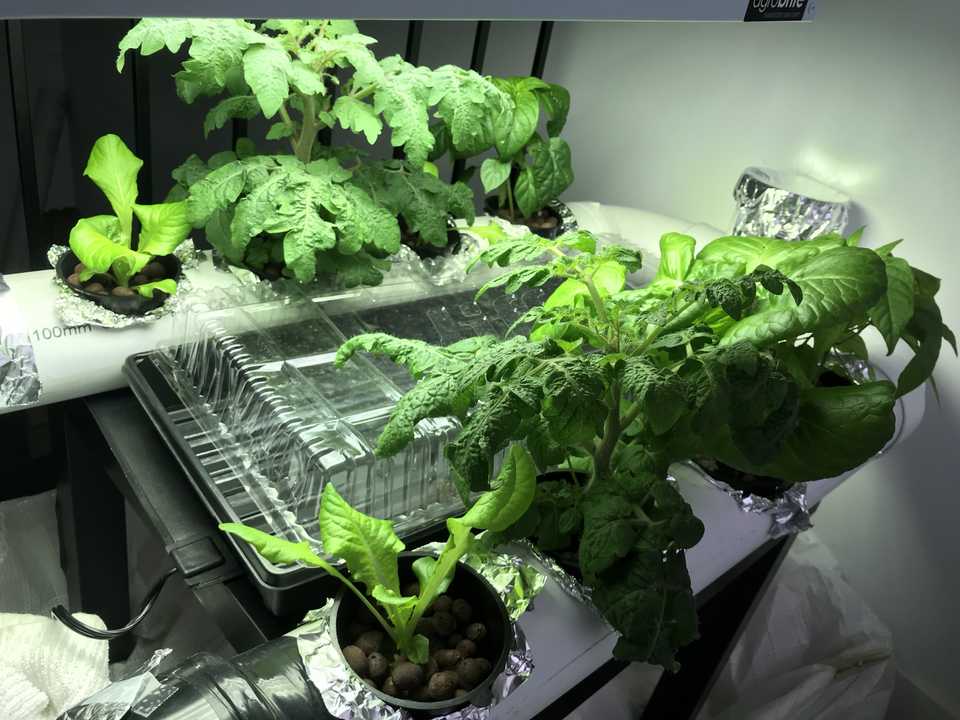
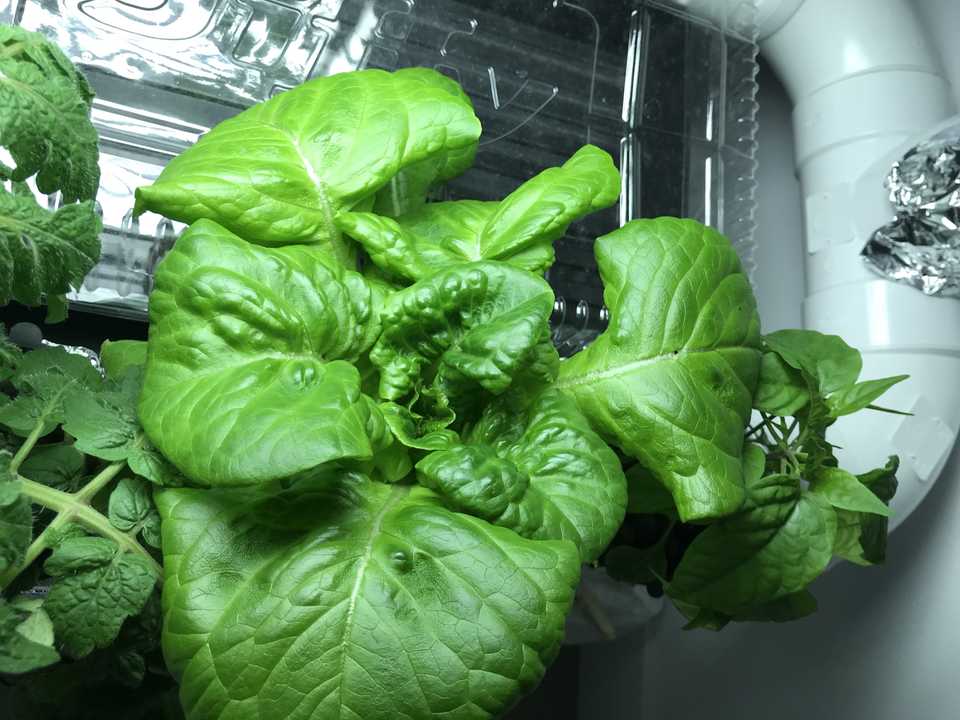
Below is a slideshow showing the progression of the growth.
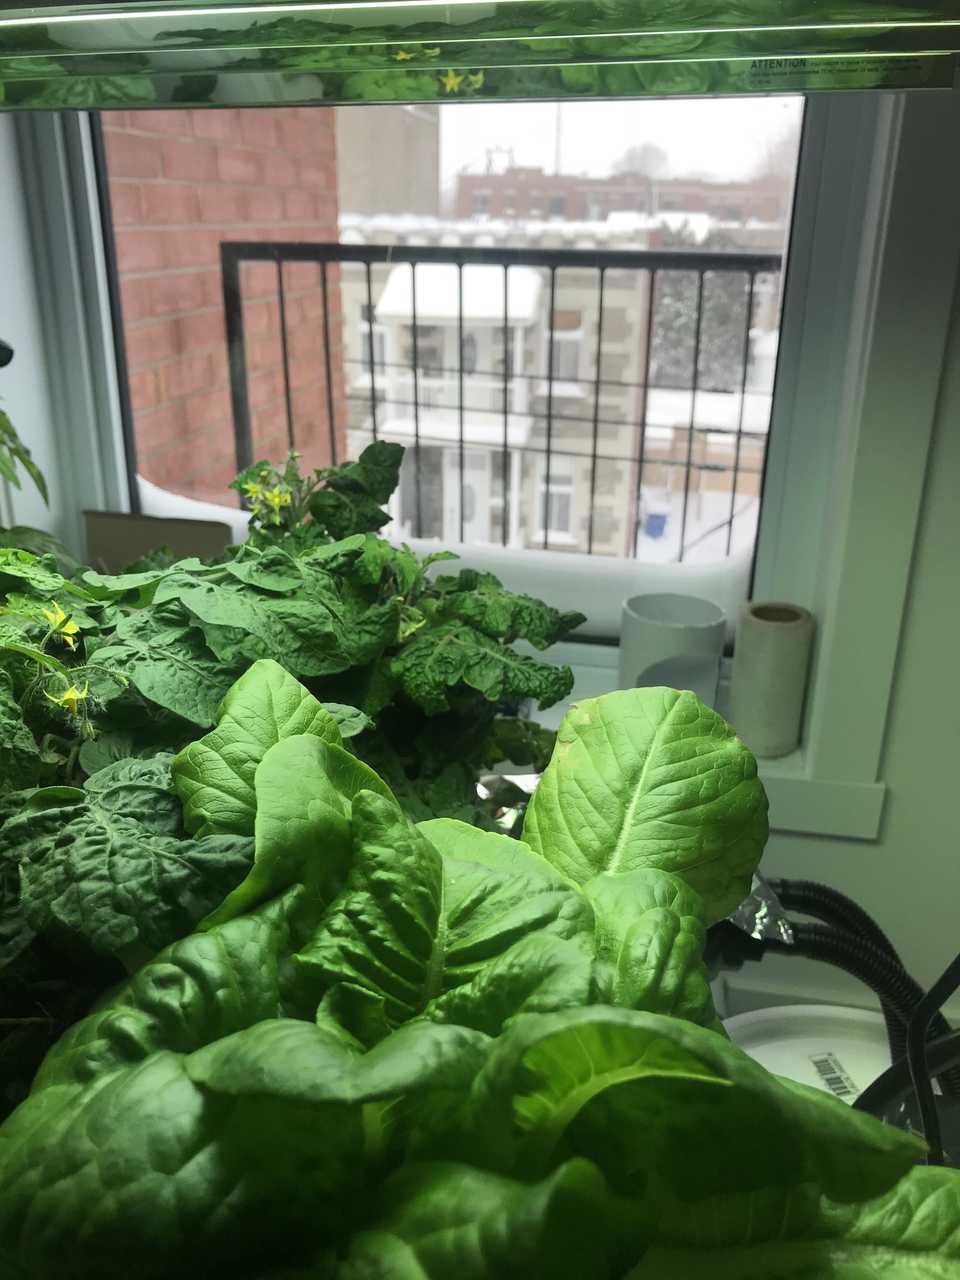
Up to now, I’ve eaten two lettuces, but there are 3 that are about ready for consumption.
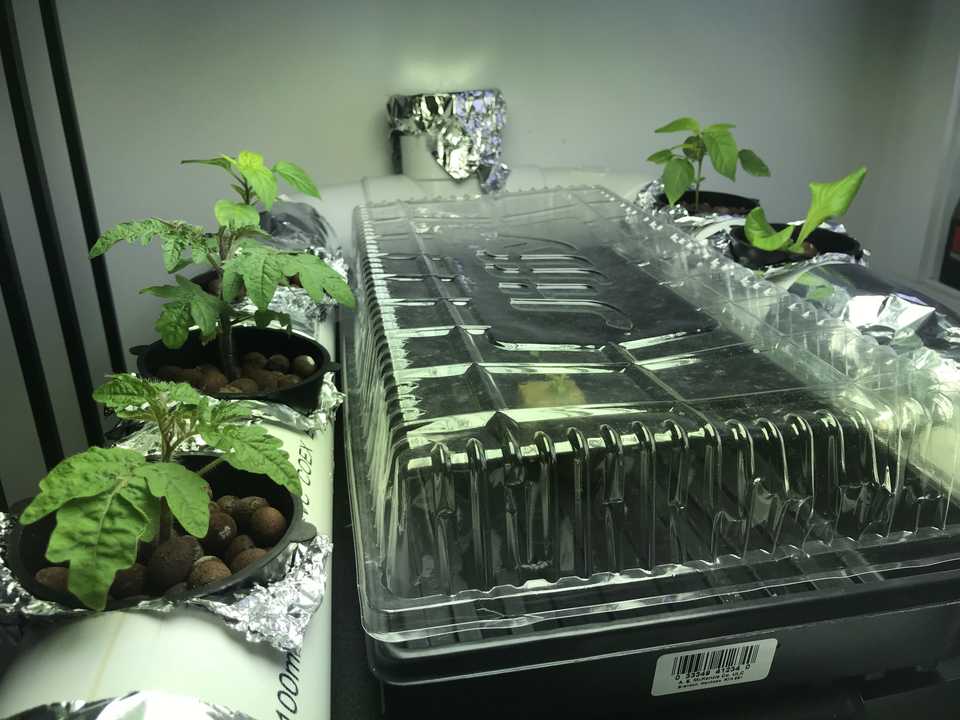
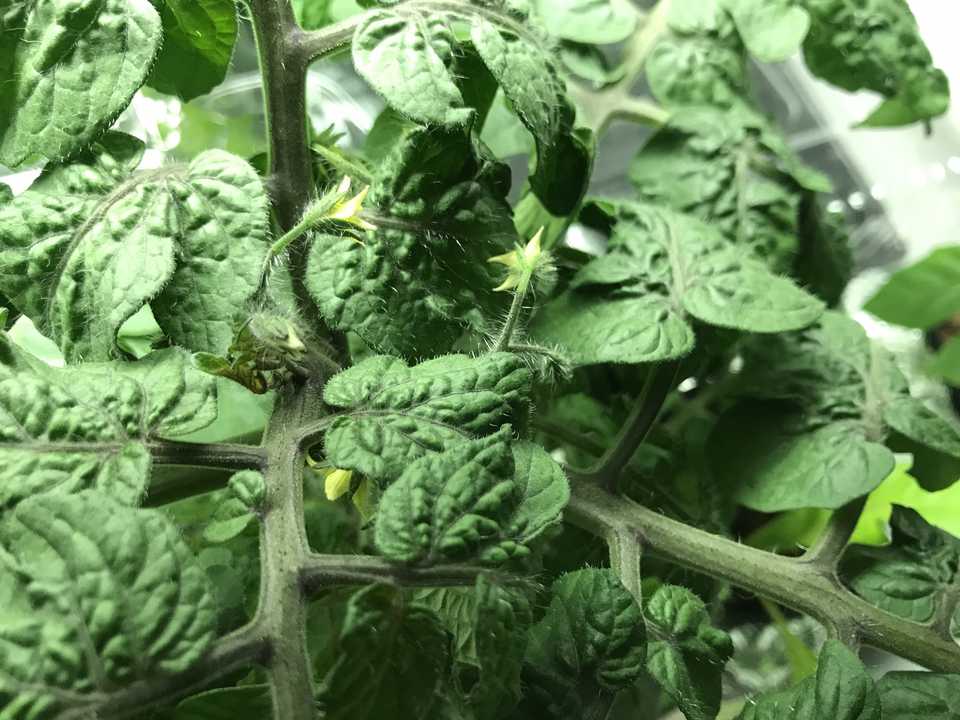
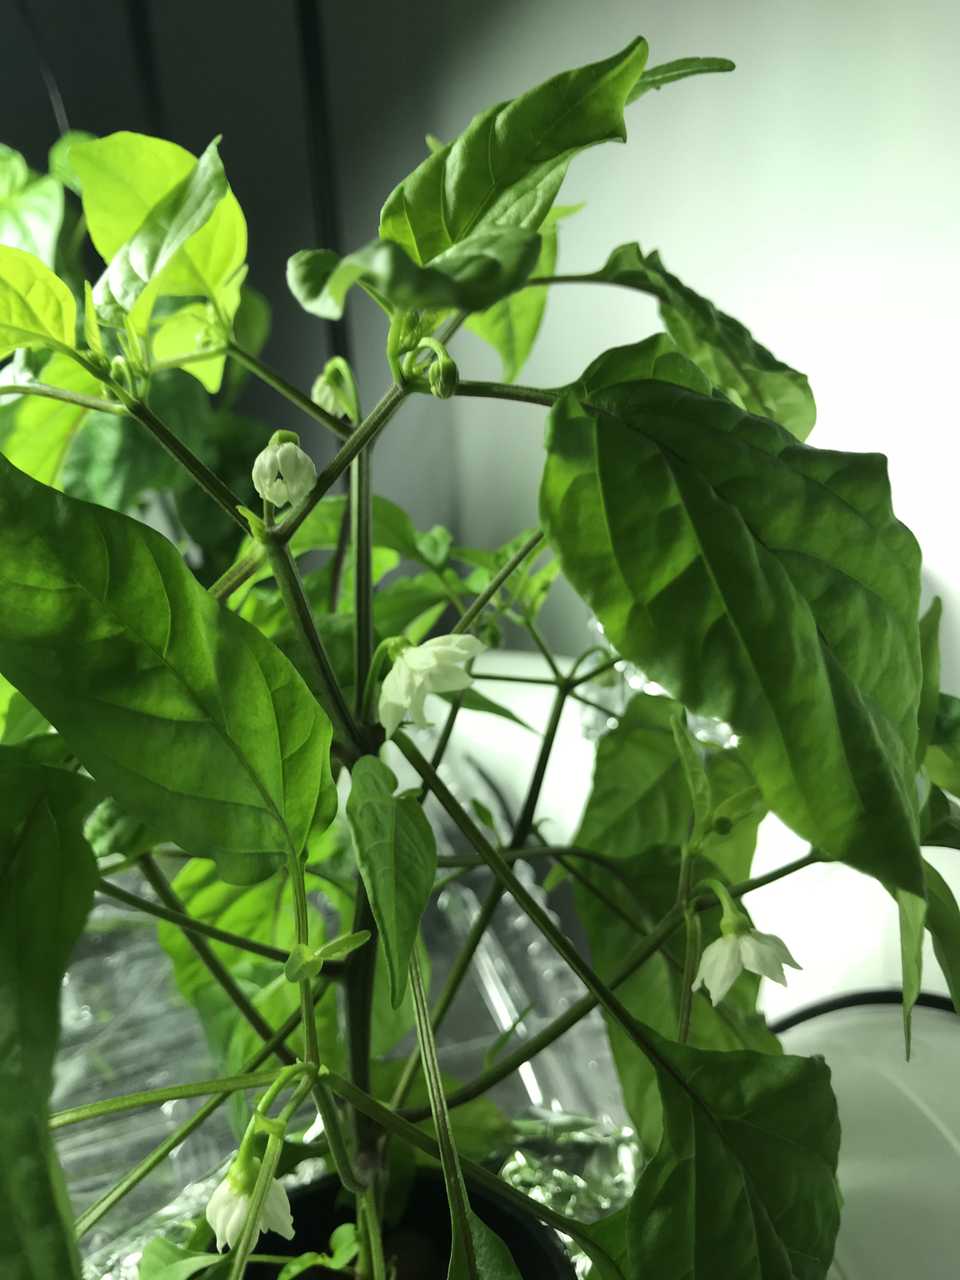
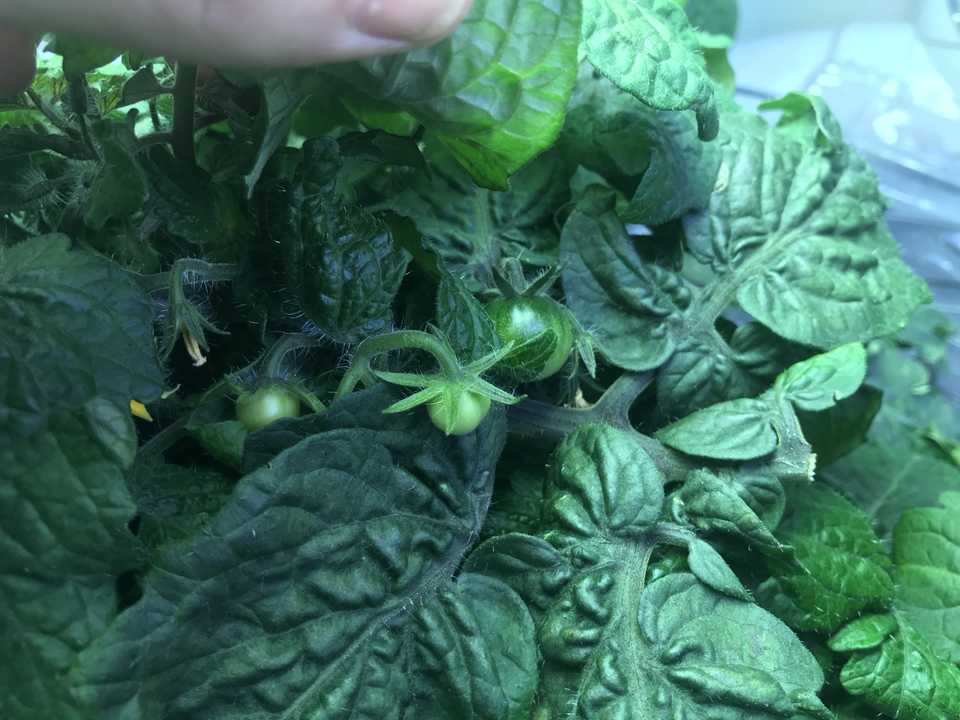
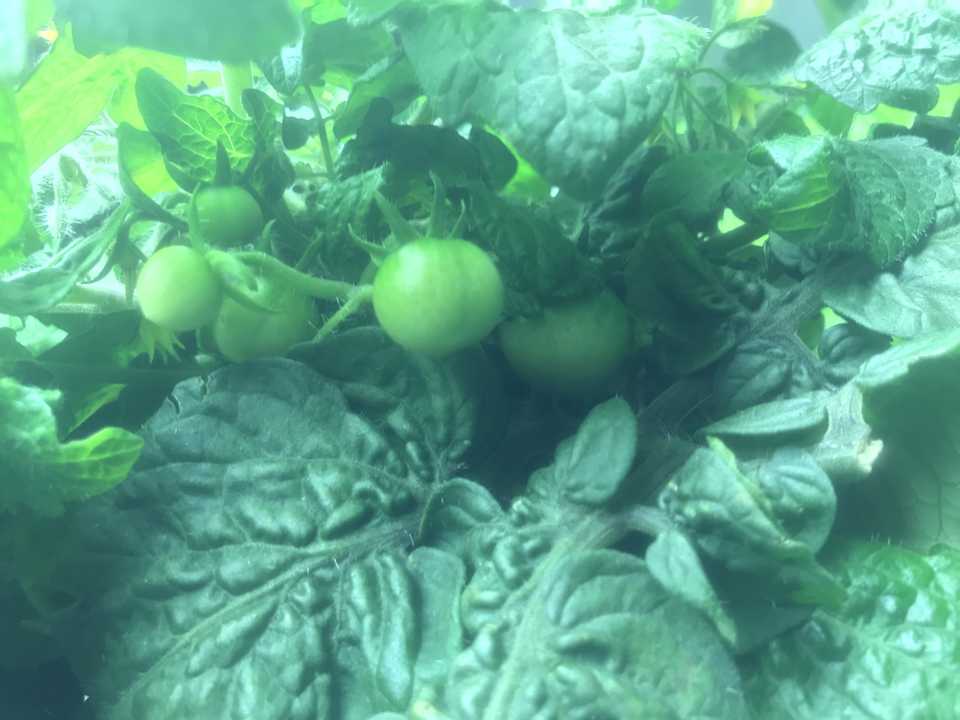
The tomato and pepper plants took longer to establish themselves and for a while, their leaves were in what seemed a pretty bad shape. I realized I had mis calibrated my pH meter and was about 30% off from the desired acidity level. After fixing that, the leaves improved and flowers appeared in all 4 plants. There are now many baby tomatoes growing.
Since the garden is indoors, bees can’t help when it comes to pollination. Tomato plants can simply be shaken since their flowers have both the male and female parts. Another way to do this is to have a fan blowing on the garden to constantly move the plants, simulating the wind. Pepper plants, however, need to be pollinated by hand. After doing some research, I’ve tried doing it with a queue tip. I think I have just succeeded as I’m seeing tiny tiny green balls in some pepper flowers.
Lessons learned
One big lesson is to make sure your pH meter is properly calibrated. I hadn’t done it properly and was about 30% off in terms of what the water’s acidity needed to be at. That caused the leaves of fruit plants to wrinkle on themselves and not produce any flowers.
I’ve gotten away with changing the water about every 10-12 days. As the tomato and pepper plants have gotten bigger, they’ve started drinking much more water, which causes the reservoir to empty out. With less water in, the acidity goes up because the ratio of water to nutrient changes. So I need to do a quick check up every two days and fix the acidity with the pH+/- solutions. With bigger tomato plants, I also now have to top up the water once between every change. One big reason to change the water completely is to prevent algae from forming in the system. I’m being as careful as I can to prevent light from hitting the water (algae needs light to grow), so I haven’t had any problems up to now.
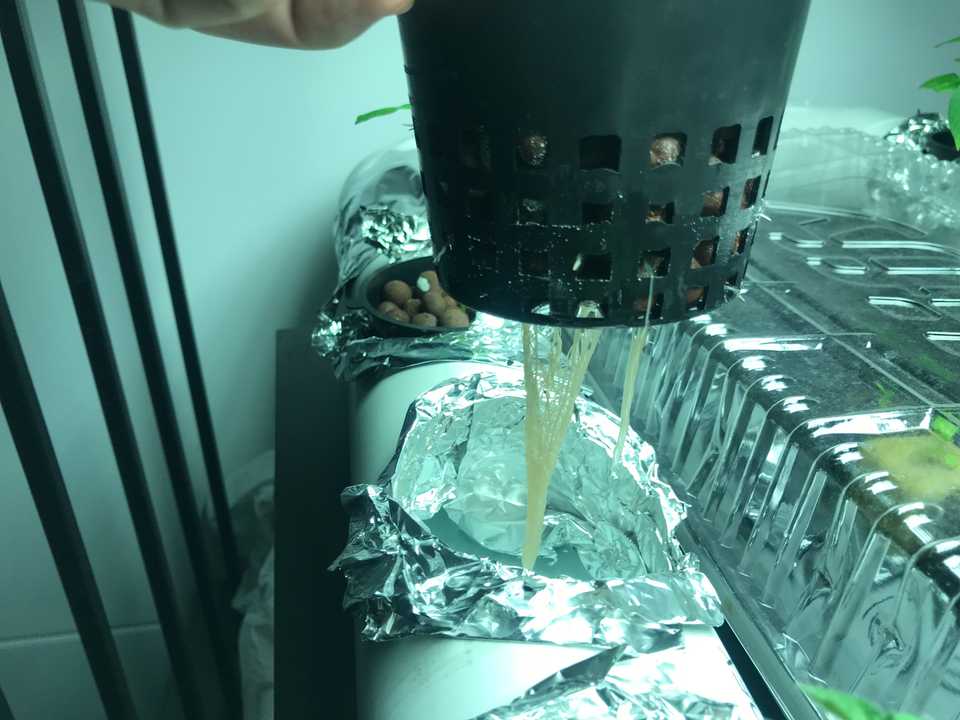
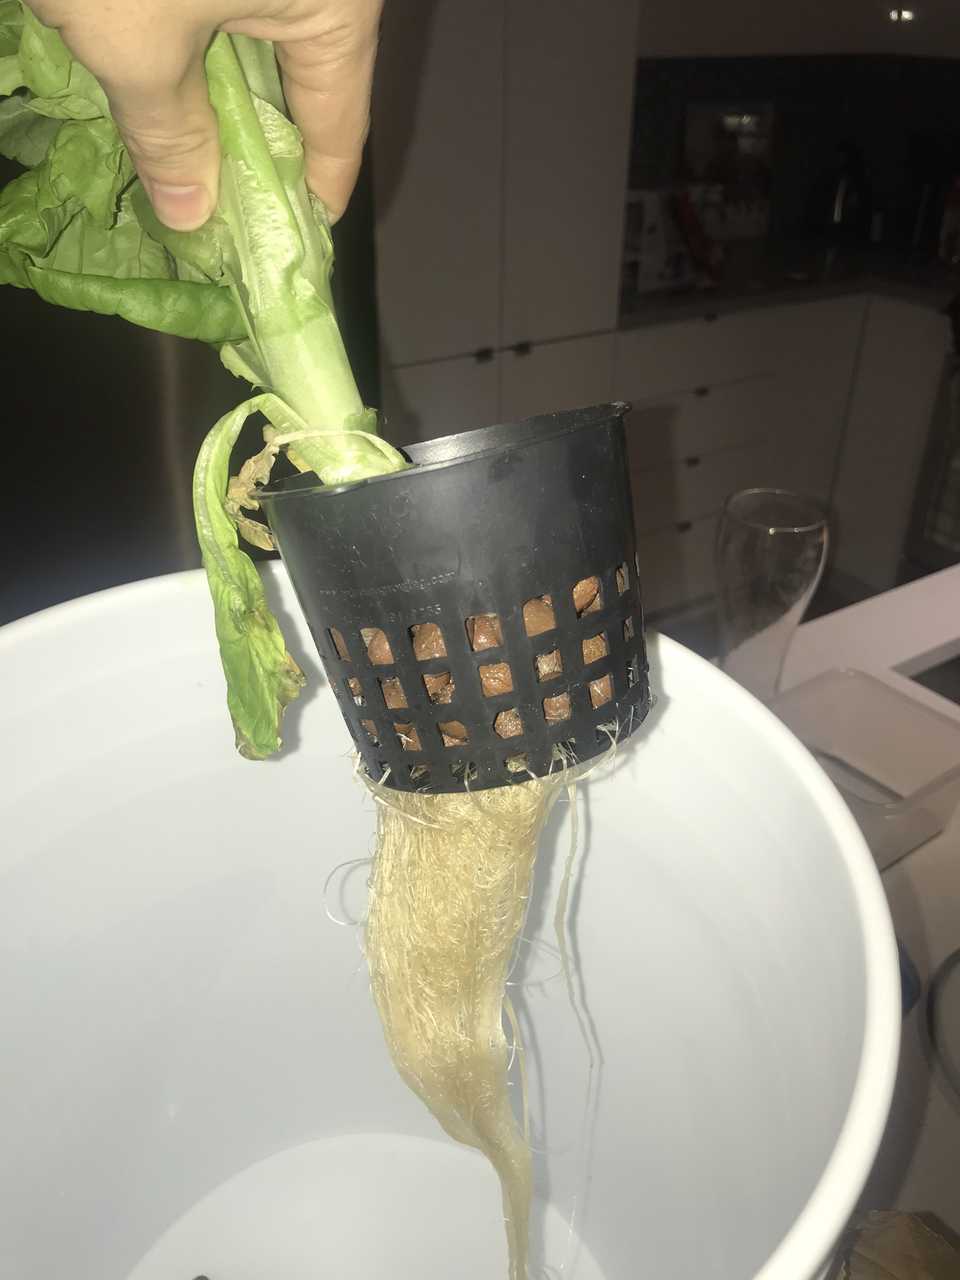
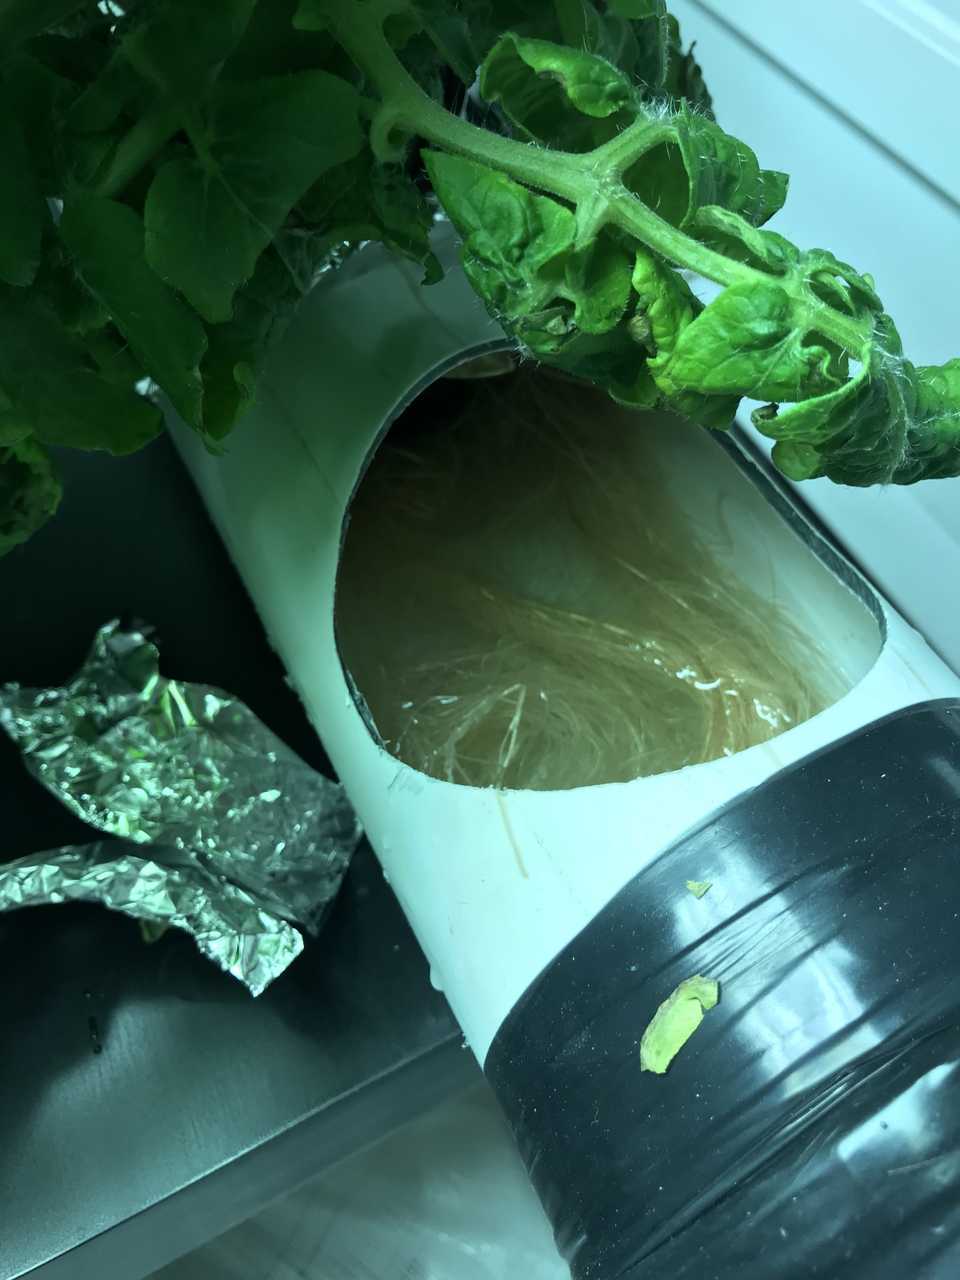
Another realization is that the system might be too small for tomato plants. As they are growing bigger, their root system also grows. After my last water change, the system started to leak because roots got into the drain and partially blocked it, causing the water level to rise too much in the system and leak through the net cup holes. This was the first real test for the emergency basin and everything worked great. I’ll have to monitor that closely and potentially remove the tomato plants, which would mean I can’t grow fruit plants in this 4’ PVC system.
Finally, the next garden I build will probably not use round pipes, but instead square fence posts, like in this project. The big reason is you can’t install drains on a round surface, and the net cups are harder to put in place. That’s why I had to put the drains in the end caps of the pipes, and I have to use aluminum foil around the cups. When changing the water, it’s hard to remove all water from the system because the drain is about 1 cm from the bottom, so I have to tilt the whole thing. Having a drain at the bottom would make it much easier.
Next steps
I’ve bought an ultrasonic distance sensor for the Pi and have been planning to install on the inside of the water reservoir cover. This would allow monitoring of the water level in the reservoir, allowing me to programmatically stop the pump if required. This could happen if the plants drink all the water or if there is a leak. It would even be possible to differentiate between the two based on the rate of change. Taking an automated action in case of a leak would be a great second contingency system. Adding extra sensors to track how the water is doing would also be great, like a pH sensor, so I don’t have to do it myself every other day. Professional sensor systems exist but they’re pretty expensive.
I also have a webcam ready and I’m planning to start taking pictures every few minutes to create a time-lapse video showing how things are changing over time. I’ve done that for seeds and it’s pretty fun to watch. The second thing I’d like to do with the images is to automatically track the growth of plants by doing some image analysis.
Having both extra sensors and the video feed that I can analyze automatically is really what unlocks optimizing the garden conditions to maximize yield.
Closing remarks
I took a pretty complicated route to get to where I am. If you’re interested in trying out a hydro garden, a 100-200$ hydroponic kit will certainly do the job. You could even go the soil route by only getting a lamp.
Happy hydro gardening!



7 thoughts on "Building an indoor NFT hydroponics system with Raspberry Pi monitoring"
Commented 2019-05-19 14:43:54
Hi @James Tu, thanks for the comment. Because hydroponics uses nutrient rich water, preventing sunlight from shining on the water is very important to prevent the growth of algae. So although it would be pretty awesome to have transparent pipes to watch the root network grow, it would also turn the water green and create lots of problems in the system :)
Commented 2019-05-16 13:50:09
This was an incredible read! I'm working on my own hydroponics system (DWC) and using a Raspberry Pi to monitor it. I'm always looking to add more sensors, but I found your article because I'm trying to do research on what data is actually valuable in determining plant health and growing conditions.
It would be awesome to chat with you sometime for your opinion on my setup, but in the meantime if you're interested in contributing, I started a project called Piodome on Github! It's meant to be a one-line install script to set up sensor reading, OLED screen writing, and spin up a Grafana server and start recording data (not quite there yet).
https://github.com/kyletaylored/piodome
Commented 2019-05-06 19:18:31
Thanks for sharing. But I think the system would be better if you use Transparent pipelines. So you can watch and monitor them easier :D
Commented 2018-11-23 06:53:26
Nft hydroponics system, it is proved that the yield is high and also rich in protein in this method. So this method is regarded as the easiest and more effective method in the entire method of hydroponics cultivation.
Commented 2019-03-28 00:35:51
After spending some time reading your article on gardening, I got to say you, hello! I think it’ll save me serious time doing the research for one of the resources for our community as well as the website
Commented 2019-03-04 08:20:41
Really interesting, thanks for taking the time to make this a available.